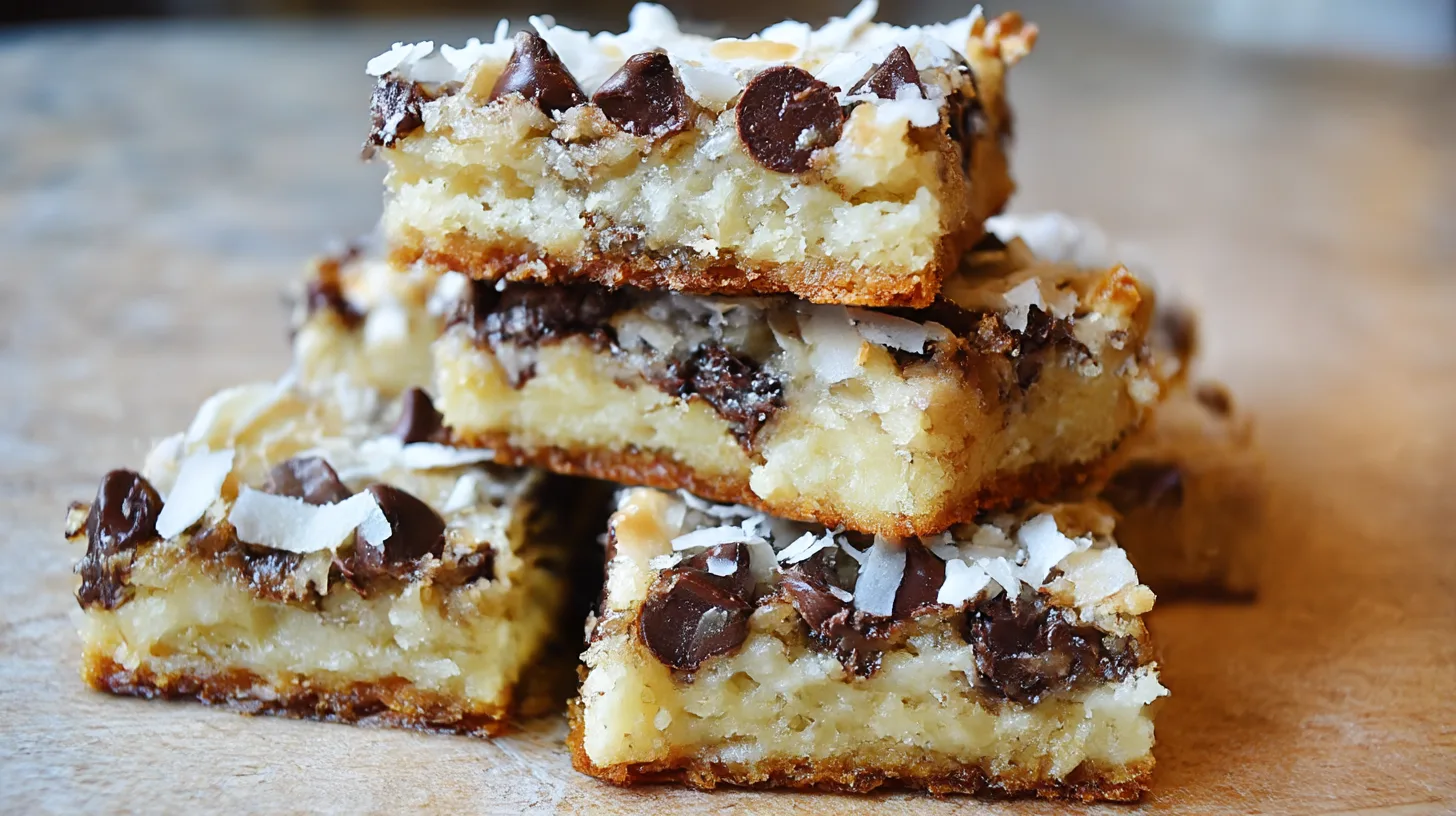
Hi, I’m Lina, I’m 33 and living in the United States. My love for cooking started in the most natural way—by spending time in the kitchen with my grandmother. I still remember the sweet aroma of toasted coconut and melting chocolate drifting through her kitchen as she made her favorite bars. The crackle of the oven and her gentle humming always made everything feel warm and safe. Try it it might remind you of a meal your grandmother once made.
Why You’ll Love This Recipe
You’ll love this recipe because it’s simple, satisfying, and versatile. Everything gets layered in one pan — no fancy equipment, no complicated steps. Just pure dessert joy.
It’s the kind of gluten-free dessert that tastes just as rich as traditional cookie bars, but with the bonus of wholesome almond flour and naturally sweet condensed coconut milk. Perfect for sharing with family, packing in lunch boxes, or sneaking from the fridge at midnight.
Ingredients Detailed
- ½ cup butter, melted (vegan or regular): adds rich flavor and helps the base stay moist.
- 1½ cups almond flour: gives a nutty, gluten-free crust that holds everything together.
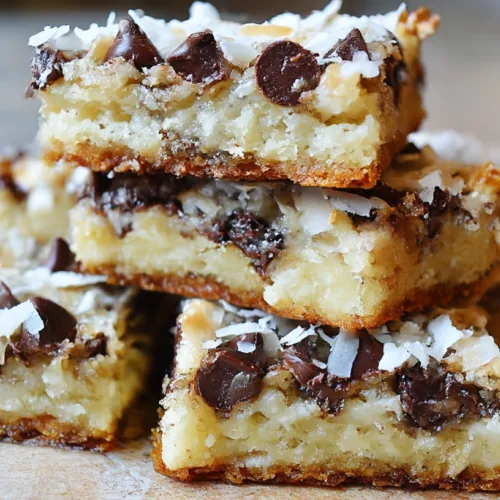
- 1 cup coconut shreds: adds chewy texture and tropical sweetness.
- 1 cup walnuts, chopped: brings crunch and a toasty, earthy balance to the sweetness.
- 1 cup chocolate chips: melts into pockets of rich, gooey chocolate throughout the bars.
- 1 (12 oz) can sweetened condensed coconut milk: the creamy “magic” that binds everything and gives that irresistible gooey center.
Directions (Step-by-Step Cooking Guide)
- Preheat and prepare the pan. Set your oven to 350°F and line a 9-inch square baking dish with parchment paper. This will make removing the bars super easy later.
- Start the buttery base. Pour melted butter directly into the baking dish, letting it coat the bottom evenly. The butter gives that classic golden, crisp foundation.
- Add the almond flour layer. Sprinkle almond flour evenly over the melted butter, pressing it gently with the back of a spoon or cup. You’ll see a soft, nutty crust forming.
- Layer on the coconut. Scatter the shredded coconut evenly. As it bakes, it will toast slightly and release that warm, tropical aroma.
- Add the crunch and chocolate. Sprinkle chopped walnuts and chocolate chips over the coconut. You’ll already start seeing the layers of goodness building up.
- Pour on the magic. Slowly drizzle the sweetened condensed coconut milk evenly across the entire pan. This will seep into the layers and caramelize beautifully as it bakes.
- Bake until golden. Slide the pan into the oven and bake for 30–35 minutes, until the edges are golden brown and the center looks set.
- Cool and enjoy. Let the bars cool completely before cutting — this helps them firm up. For quicker cooling, pop them in the fridge or freezer for a few minutes.
Cultural or Technique Note
These Magic Cookie Bars are a fun twist on a beloved American classic, often called “Seven Layer Bars.” The use of condensed coconut milk instead of traditional condensed milk makes them dairy-free and gives a subtle tropical flavor that pairs perfectly with chocolate and nuts. It’s comfort food reimagined for modern, mindful baking.
Serving Suggestions
- Enjoy warm with a scoop of dairy-free vanilla ice cream: The contrast of warm, gooey chocolate with cold, creamy ice cream is pure bliss — like a brownie sundae but with toasted coconut.
- Serve chilled for a chewy, candy-like texture: After a few hours in the fridge, the bars become dense and satisfyingly chewy, almost like homemade candy bars.
- Pack in lunchboxes or picnic baskets for an easy treat: These bars travel beautifully — no frosting to melt, no crumbs to worry about. Just sweet, sturdy squares that make everyone smile.
- Crumble over yogurt for a sweet breakfast twist: Break a bar into small chunks and sprinkle them over Greek or coconut yogurt. It adds crunch, chocolate, and coconut flavor — like a dessert disguised as breakfast.
- Pair with coffee or tea for an afternoon pick-me-up: A small square next to your favorite warm drink turns snack time into something cozy and special.
- Gift them in boxes or jars: Wrap a few bars in parchment, tie with twine, and you’ve got an instant homemade gift that looks and tastes heartfelt.
Pro Tips for Success
- Line your pan well with parchment paper: It’s the secret to lifting the bars out cleanly without any sticking or crumbling.
- Pour the condensed coconut milk evenly: Drizzle slowly from corner to corner so every bite gets that gooey sweetness.
- Don’t overbake: The edges should be golden and slightly crisp, but the center should still look soft — it’ll firm up as it cools.
- Toast your nuts for extra flavor: Lightly toasting the walnuts before layering brings out a deeper, nuttier aroma that makes the bars irresistible.
- Let them cool completely before slicing: Warm bars can fall apart easily, so give them time to set — patience makes perfect squares.
- Chill before serving for clean edges: A quick chill in the fridge helps the bars firm up for neat, bakery-style cuts.
- Store in the fridge for the best texture: The cool temperature keeps them chewy and prevents the chocolate from melting.
Common Mistakes to Avoid
- Overbaking: Makes the bars hard and dry — remove them once the edges are golden and the center still looks slightly soft.
- Uneven layering: Leads to dry or overly sweet spots — spread each ingredient evenly with a light hand.
- Skipping parchment paper: The bars can stick stubbornly to the pan — parchment makes cleanup and slicing effortless.
- Cutting while warm: The gooey center will crumble apart — wait until fully cooled or chilled.
- Using unsweetened condensed milk: It won’t caramelize properly — always use sweetened condensed coconut milk for that signature flavor.
- Rushing cooling time: Letting them rest ensures the texture sets perfectly and the flavors meld beautifully.
Storage & Reheating
Fridge: Store in an airtight container for 3–4 days. They stay soft, chewy, and ready for a quick snack or dessert.
Freezer: Keep in a freezer-safe bag or container for up to 2 months. Layer parchment between pieces to prevent sticking.
To serve from frozen: Let the bars sit at room temperature for about 15–20 minutes — they’ll taste freshly baked again.
Reheat: If you prefer them warm, gently heat in the microwave for 10–15 seconds or in a low oven until just soft. Add a splash of moisture (like a drop of plant milk) if reheating for longer.
Frequently Asked Questions (FAQ)
Q1: Can I make these bars nut-free?
Definitely. Simply omit the walnuts or replace them with sunflower seeds, pumpkin seeds, or crushed pretzels for a salty crunch.
Q2: Can I use regular condensed milk instead of coconut?
: Yes! Regular sweetened condensed milk works beautifully if you’re not dairy-free. The texture will be the same, and the flavor slightly richer.
Q3: How do I make sure the bars hold together?
: The key is cooling time. Let the bars rest completely before cutting so the condensed milk sets into that perfect gooey-but-firm texture.
Q4: Can I double this recipe?
: Absolutely. Use a 9×13-inch pan and double each ingredient evenly. The baking time may be slightly longer, but keep an eye on those golden edges.
Q5: How can I make them less sweet?
: Use dark chocolate chips instead of semi-sweet, and try unsweetened coconut shreds to balance the sweetness naturally.
Closing Paragraph
These Magic Cookie Bars with Condensed Coconut Milk are the kind of dessert that feels both nostalgic and new — a perfect blend of comfort and simplicity. Whether you’re serving them for a celebration or just need something sweet after dinner, they deliver every time. Customize them to your liking, share them with friends, and let their gooey, chocolatey charm win everyone over.
Final Thoughts
When I bake these, my whole kitchen smells like coconut and chocolate heaven — it’s the kind of scent that makes everyone wander in asking what’s in the oven. They’re a reminder that gluten-free baking can be just as magical as the classics. I hope you love every bite as much as I do.
Magic Cookie Bars with Condensed Coconut Milk
Equipment
- 9-inch square baking dish
- Parchment Paper
- Measuring Cups
- Mixing Bowl
Ingredients
Base & Layers
- 1/2 cup butter melted, vegan or regular
- 1 1/2 cups almond flour
- 1 cup coconut shreds unsweetened or sweetened, as preferred
- 1 cup walnuts chopped
- 1 cup chocolate chips dairy-free if needed
- 12 oz sweetened condensed coconut milk 1 can
Instructions
- Preheat oven to 350°F and line a 9-inch square baking dish with parchment paper.
- Pour the melted butter into the baking dish, spreading evenly to cover the bottom.
- Sprinkle almond flour evenly over the butter and press gently to form a crust.
- Evenly layer the coconut shreds over the crust.
- Sprinkle chopped walnuts and chocolate chips over the coconut layer.
- Drizzle the sweetened condensed coconut milk evenly over the entire pan, making sure to cover all corners.
- Bake for 30–35 minutes, or until edges are golden and center looks set.
- Cool completely in the pan before slicing into bars. Chill in the fridge for cleaner cuts.