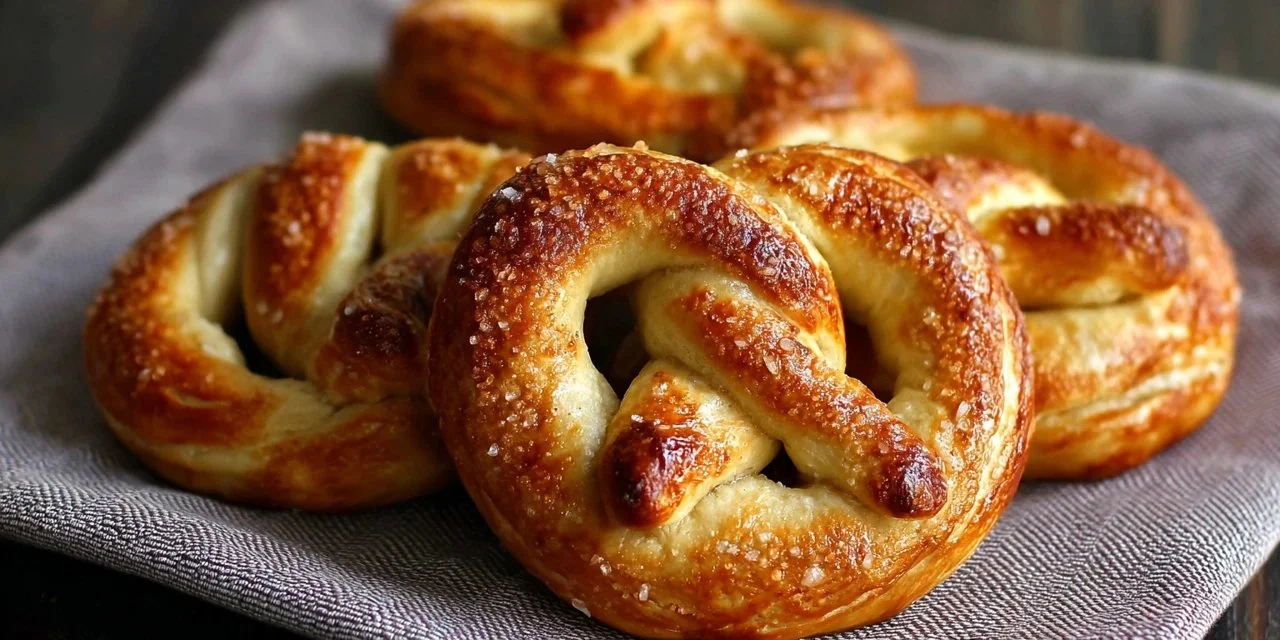
Homemade Soft Pretzels
Homemade soft pretzels are the perfect blend of chewy and soft textures, making them a beloved snack or treat for any occasion. Whether enjoyed at a party, game day, or simply as an after-school snack, they bring a sense of comfort and satisfaction. The process of making your own pretzels can be surprisingly simple and rewarding, adding a homemade touch to a classic favorite. They’re not only delightful to eat but also create an enjoyable cooking experience that fills your kitchen with a warm, inviting aroma.
Why You’ll Love This Recipe
With comforting flavors and a soft, chewy texture, this homemade soft pretzel recipe offers great reliability and ease in preparation. The dough is simple to work with, making it accessible even for beginner bakers. These pretzels can be enjoyed at breakfast, during snack time, or as an element of a family meal, making them a practical addition to your everyday cooking. It’s a way to bring warmth and joy into your home through baking.
Kitchen Tools You’ll Need
- Mixing bowl
- Whisk
- Rolling pin
- Baking sheet
- Parchment paper
- Cooking brush
Ingredients
- 1 1/2 cups warm water (activates yeast)
- 2 tablespoons sugar (sweetness and yeast activation)
- 1 packet active dry yeast (leavening agent)
- 4 cups all-purpose flour (structure)
- 1 teaspoon salt (flavor enhancement)
- 2/3 cup baking soda (for boiling solution)
- 1 large egg (for egg wash, adds shine)
- Coarse sea salt (for sprinkling, enhances flavor)
- Butter (for brushing, adds richness)
How to Make Homemade Soft Pretzels
Step 1
Begin by combining 1 1/2 cups of warm water in a mixing bowl with 2 tablespoons of sugar and 1 packet of active dry yeast. Stir the mixture gently to dissolve the yeast and sugar completely. Allow it to sit for about 5 to 10 minutes until it becomes frothy. This bubbling indicates that the yeast is active and ready to work, which is crucial for the dough’s rise.
Step 2
Add 4 cups of all-purpose flour and 1 teaspoon of salt to the yeast mixture. Use a whisk or a wooden spoon to mix the dry ingredients into the wet until a cohesive dough forms. At this stage, the dough may still be slightly sticky, but it should start pulling away from the sides of the bowl. This indicates that you’ve combined everything well and are ready for the next step.
Step 3
Turn the dough onto a lightly floured surface and knead for about 5 to 7 minutes. As you knead, the dough should become smooth and elastic. If it feels too sticky, add a bit of flour, but be cautious not to add too much. Kneading develops the gluten, which is crucial for achieving the right texture in your pretzels.
Step 4
Once your dough is smooth, shape it into a ball and place it into a lightly greased bowl. Cover it with a clean towel or plastic wrap, and set it in a warm place to rise. Let the dough rise until it doubles in size, usually about 1 hour. To check for readiness, gently press the dough; if it keeps an indentation, it has risen sufficiently.
Step 5
After the dough has risen, turn it out onto a floured surface again and divide it into 8 equal pieces. This portioning allows each piece to be shaped into individual pretzels. As you shape, remember that each piece should be uniform to ensure even cooking.
Step 6
Roll each piece of dough into long ropes, approximately 24 inches in length. It’s helpful to use your palms and apply gentle pressure to keep them even. Don’t worry if they aren’t perfect; slight variations can add character to your pretzels.
Step 7
Form the pretzel shape by making a U with the rope, then crossing the ends over each other and pressing them down to the bottom of the U. Place your shaped pretzels on a parchment-lined baking sheet and make sure they have enough space between them to expand slightly.
Step 8
Preheat your oven to 425°F while you prepare the baking soda solution. In a medium pot, bring 2/3 cup of baking soda and 10 cups of water to a boil. This step is essential as the baking soda solution gives the pretzels their characteristic flavor and brown color.
Step 9
Once the baking soda solution is boiling, carefully add each pretzel to the pot, allowing them to boil for about 30 seconds on each side. This boiling step helps set the outer layer of the pretzels. As you add them to the pot, you can use a slotted spoon to gently flip them over for even cooking.
Step 10
Remove the pretzels from the boiling water using the slotted spoon and transfer them back to the baking sheet. Allow any excess water to drain. The pretzels should now appear slightly puffed, which is a good sign that they are ready for baking.
Step 11
In a small bowl, whisk together 1 large egg. Brush a thin layer of the egg wash over each pretzel to give them a beautiful golden finish. The egg wash is what creates that shiny crust that we love so much in soft pretzels.
Step 12
Sprinkle coarse sea salt generously over each pretzel, ensuring they’ll have that classic salty flavor. You’ll want to apply the salt while the egg wash is still wet for better adherence.
Step 13
Bake the pretzels in your preheated oven for 12 to 15 minutes, or until they are a deep golden brown. Keep an eye on them as baking times may vary slightly based on your oven. You’ll know they are done when they are beautifully brown and smell amazing.
Step 14
Once fully baked, remove the pretzels from the oven and let them cool on a wire rack for a few minutes. To finish, brush each pretzel with melted butter for added flavor and richness. This step not only enhances their taste but also adds a lovely shine.
Step 15
Serve the pretzels warm, perhaps with mustard or cheese sauce for dipping. While they are best enjoyed fresh, the delicious aroma of baked pretzels makes them hard to resist, and they are perfect for sharing.
Serving Suggestions
Homemade soft pretzels can be a delightful addition to breakfast when paired with eggs or simply enjoyed with a cup of coffee. At snack time, they are great served warm with a side of mustard or a creamy cheese dip. They also make a fantastic side dish during family meals, complementing soups or stews. Storing leftovers is easy, and they reheat well, making them a versatile option for casual dining.
Pro Tips for Best Results
- Use Warm Water: Ensure the water is warm, around 110°F, to activate the yeast effectively.
- Don’t Rush the Rise: Allow the dough to rise fully for optimal texture.
- Maintain Even Thickness: When rolling out the dough, keep the thickness consistent to ensure even baking.
- Watch Your Baking Time: Every oven heats differently, so check the pretzels a minute or two before the suggested time.
- Brush with Butter: Brushing with melted butter right after baking enhances flavor and adds moisture.
- Use Coarse Sea Salt Wisely: Sprinkle salt generously, but sparingly. It elevates flavor without overwhelming the pretzel.
Common Mistakes to Avoid
- Skipping the Yeast Activation: Not properly activating the yeast can lead to dense pretzels. Always look for foam before proceeding.
- Using Cold Water: Cold water won’t activate the yeast, resulting in no rise. Always use warm water as specified.
- Not Kneading Enough: Insufficient kneading can yield tough pretzels. Aim for a smooth, elastic dough.
- Overcrowding the Baking Sheet: Placing pretzels too closely can prevent browning and lead to uneven cooking.
- Underbaking: Remove pretzels too soon, and they will be doughy inside. Ensure they’re a deep golden brown.
- Skipping the Boiling Step: Boiling pretzels in baking soda water gives them their unique flavor and chewiness. Don’t skip this crucial step.
Variations & Substitutions
For a different flavor, consider adding spices like garlic powder or onion powder into the dough. You can also sprinkle various toppings such as everything bagel seasoning, or even cinnamon sugar for a sweet version. If you’re feeling adventurous, try shaping the pretzels into different designs or using flavored butters for additional taste variations.
Storage & Reheating
Store leftover pretzels at room temperature in an airtight container for up to two days. For longer storage, place them in the refrigerator for up to a week, ensuring they’re sealed tightly to prevent drying out. You can also freeze the pretzels; wrap them well in plastic wrap and then in foil before freezing for up to three months. To reheat, warm them in the oven at 350°F for about 5 to 7 minutes for the best texture.
Nutrition Information
Nutrition values are estimates and may vary based on ingredients used.
Frequently Asked Questions
Can I make this recipe ahead of time?
Yes, you can prepare the dough ahead of time. After kneading, let it rise, then shape the pretzels and refrigerate them until you’re ready to boil and bake. Just allow some time for them to come back to room temperature before boiling.
How long does it last in the fridge?
Homemade soft pretzels can be stored in the refrigerator for up to a week. Keep them in an airtight container to maintain their freshness and avoid drying out.
Can I freeze this recipe?
Absolutely! These soft pretzels freeze well. Wrap them tightly in plastic wrap, then in foil, and store them in the freezer for up to three months.
What can I substitute for one ingredient?
You could use brown sugar instead of white sugar for a slight variation in flavor, which can add a subtle richness and molasses note to the pretzels.
Why didn’t my recipe turn out as expected?
Common issues include inactive yeast, not enough kneading, or improper baking time. Always ensure your yeast is fresh and properly activated, knead the dough thoroughly, and watch for the right color and texture when baking.
Final Thoughts
Making homemade soft pretzels is a rewarding kitchen experience that can bring warmth and joy to your home. The process is straightforward, and the results are a delicious treat the whole family will enjoy. There’s something special about creating snacks from scratch, and these pretzels can easily become a favorite in your household, filling the air with enticing aromas that invite everyone to gather and enjoy a comforting bite together.

Homemade Soft Pretzels
Ingredients
Dough Ingredients
- 1.5 cups 1 1/2 cups warm water Activates yeast
- 2 tablespoons 2 tablespoons sugar Sweetness and yeast activation
- 1 packet 1 packet active dry yeast Leavening agent
- 4 cups 4 cups all-purpose flour Structure
- 1 teaspoon 1 teaspoon salt Flavor enhancement
Boiling Ingredients
- 2/3 cup 2/3 cup baking soda For boiling solution
Finish Ingredients
- 1 large 1 large egg For egg wash, adds shine
- Coarse sea salt For sprinkling, enhances flavor
- Butter For brushing, adds richness
Instructions
Preparation
- Combine warm water, sugar, and yeast in a mixing bowl. Stir gently and let sit for 5 to 10 minutes until frothy.
- Add flour and salt to the yeast mixture, mixing until a cohesive dough forms.
- Turn dough onto a floured surface and knead for 5 to 7 minutes until smooth and elastic.
- Shape dough into a ball, place in a greased bowl, cover, and let rise in a warm place for about 1 hour.
Shaping
- Turn risen dough onto a floured surface, divide into 8 pieces.
- Roll each piece into long ropes, approximately 24 inches in length.
- Form pretzel shapes by making a U and crossing the ends over each other.
- Place shaped pretzels on a parchment-lined baking sheet.
Boiling and Baking
- Preheat oven to 425°F.
- In a pot, bring baking soda and 10 cups of water to a boil.
- Boil each pretzel for 30 seconds on each side.
- Remove pretzels and let excess water drain before transferring back to the baking sheet.
- Brush each pretzel with egg wash and sprinkle with coarse sea salt.
- Bake for 12 to 15 minutes until deep golden brown.
- Remove from oven, allow to cool for a few minutes, and brush with melted butter before serving.