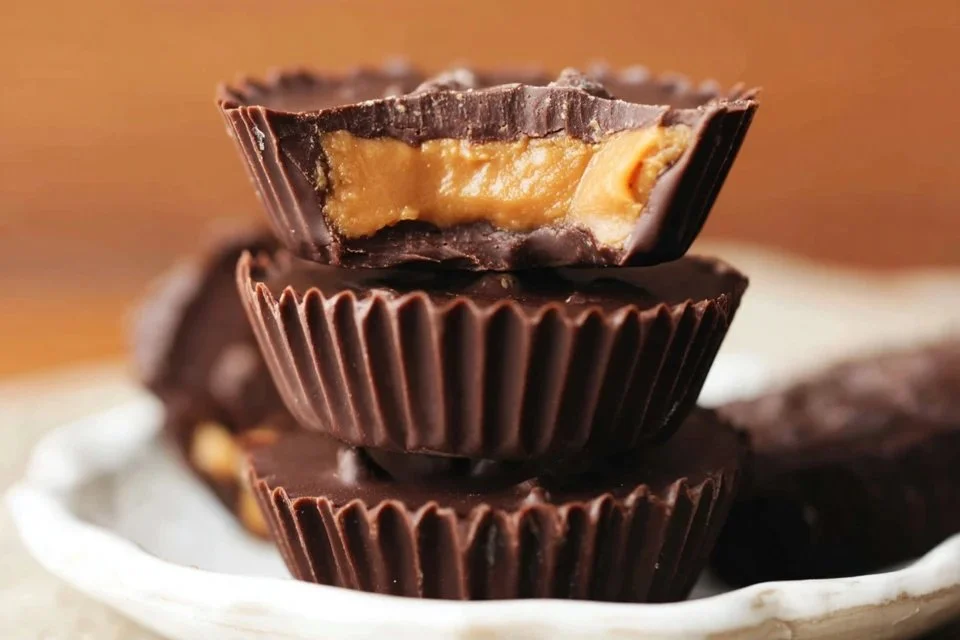
Homemade Peanut Butter Cups
Homemade Peanut Butter Cups are a delightful treat that combines rich chocolate with creamy peanut butter filling. They’re perfect for enjoying during a quiet evening, sharing with family on weekends, or bringing to gatherings. The simplicity of this recipe makes it approachable for cooks of all levels. With just a few common ingredients, you can create a comforting dessert that fits easily into everyday life. Let’s dive into making these delicious treats.
Why You’ll Love This Recipe Homemade Peanut Butter Cups
This recipe for Homemade Peanut Butter Cups is straightforward and dependable, allowing you to whip up a delicious treat in no time. With a balance of sweet and savory flavors, these peanut butter cups deliver comfort with each bite. Their practical value means you can make them anytime, whether for snacks or special occasions, making it a wonderful addition to your recipe collection.
Kitchen Tools You’ll Need
- Mixing bowl
- Measuring cups
- Rubber spatula
- Baking sheet
- Wax paper
Ingredients
- 1/2 cup creamy peanut butter (smooth texture)
- 2 tablespoons unsalted butter (adds richness)
- 2 tablespoons light brown sugar (provides sweetness and moisture)
- 1/8 teaspoon salt (enhances flavor)
- 1/2 teaspoon vanilla extract (adds warmth and depth)
- 1/2 cup powdered sugar (sweetness and binding)
- 2 cups chocolate melting wafers (for coating, smooth melting quality)
- 1 teaspoon coconut oil (helps with consistency and shine)
How to Make Homemade Peanut Butter Cups
Step 1. Start by combining the creamy peanut butter and unsalted butter in a medium mixing bowl. Mix them well until they are completely blended. Look for a smooth and homogenous mixture. This step is crucial as it creates the rich filling for your peanut butter cups.
Step 2. Add the light brown sugar and salt to the peanut butter mixture. Stir until the sugar is fully incorporated and the mixture becomes creamy. This brings out the sweet and savory flavor that enhances the overall taste of the cups.
Step 3. Next, mix in the vanilla extract and powdered sugar. Continue to stir until you achieve a thick, well-combined filling. The powdered sugar will provide sweetness and help bind the mixture, giving it a nice texture.
Step 4. Once your peanut butter filling is ready, prepare a baking sheet lined with wax paper. Use a teaspoon to scoop rounded amounts of the filling and place them on the lined sheet. Make sure to space them out evenly, allowing room for shaping later.
Step 5. After scooping the filling, gently flatten each mound into a disc shape. This will help them fit nicely into the chocolate coating later. Watch for uniformity in size for even melting and best presentation.
Step 6. Place the baking sheet in the freezer to firm up the filling for about 30 minutes. This step helps the filling hold its shape during the chocolate coating process, making it easier to assemble later.
Step 7. While the filling is chilling, melt the chocolate melting wafers. Use a microwave-safe bowl and heat them in short intervals, stirring between each, until fully melted. Be careful not to overheat, as it can cause the chocolate to seize.
Step 8. Add the coconut oil to the melted chocolate and stir until it’s combined and smooth. The coconut oil will improve the texture of the chocolate, making it glossy and easier to work with.
Step 9. Once the filling is firm, remove it from the freezer. Dip each peanut butter cup filling into the melted chocolate, ensuring it is evenly coated. Use a fork to lift them out, allowing excess chocolate to drip off.
Step 10. Return the dipped peanut butter cups to the baking sheet and let them set at room temperature or in the refrigerator until the chocolate hardens. Check for proper coating and let them cool completely for the best texture.
Serving Suggestions
Homemade Peanut Butter Cups are perfect as an afternoon snack or a dessert after dinner. They make a great addition to breakfast on special occasions or can be enjoyed with your morning coffee. You can even slice them in half for a simple treat to share with family or friends. If you have leftovers, they can be stored for later enjoyment, making them versatile and convenient.
Pro Tips for Best Results
- Use high-quality chocolate melting wafers for the best flavor and texture.
- Make sure the peanut butter is fully blended to avoid clumps in the filling.
- Let the melted chocolate cool slightly before dipping to prevent melting the filling.
- If you find the mixture too soft to shape, return it to the fridge for a few more minutes.
- For a fun twist, add a bit of crushed pretzel or sea salt to the filling for extra crunch.
Common Mistakes to Avoid
- Using natural peanut butter: Natural peanut butter can be too oily and runny, making it hard to shape. Use creamy peanut butter for a stable filling.
- Skipping the chilling step: If you don’t chill the filling long enough, it may not hold its shape when coating. Always allow ample time in the freezer before dipping.
- Overheating chocolate: Overheating chocolate can cause it to seize and become unusable. Melt it slowly in short bursts, stirring frequently.
- Not spacing the filling: If you place the filling too close together on the baking sheet, they may stick to each other when freezing. Give them enough room to separate.
- Neglecting the coating: Ensure each peanut butter cup is fully coated in chocolate for even flavor and texture. Thin coatings can lead to a lack of richness in each bite.
- Not letting them cool completely: If you rush the cooling process, the chocolate may be soft or sticky, affecting the final texture. Always let them set fully before serving.
Variations & Substitutions
- For a different flavor, try using dark chocolate or white chocolate melting wafers.
- You could add crushed nuts or toffee bits into the filling for added texture and flavor.
- Experiment with flavored extracts, like almond or maple, for a unique twist on the classic recipe.
Storage & Reheating
Store Homemade Peanut Butter Cups in an airtight container at room temperature for up to a week or in the refrigerator for longer freshness. If you prefer to freeze them, place them in a freezer-safe container, separating layers with parchment paper. They can be stored in the freezer for up to three months. To enjoy frozen cups, let them thaw at room temperature for a few minutes before eating to restore a slightly soft texture.
Nutrition Information
- Calories: 180
- Total Fat: 12g
- Saturated Fat: 5g
- Carbohydrates: 18g
- Fiber: 1g
- Sugar: 10g
- Protein: 3g
- Sodium: 90mg
Frequently Asked Questions
Can I make this recipe ahead of time?
Yes, you can prepare the Homemade Peanut Butter Cups in advance. They store well in the refrigerator or freezer, allowing you to make them ahead for special occasions or snacks.
How long does it last in the fridge?
When stored in an airtight container, these peanut butter cups can last up to two weeks in the fridge, maintaining their flavor and texture.
Can I freeze this recipe?
Absolutely! You can freeze the peanut butter cups for up to three months. Make sure to store them in a freezer-safe container to keep them fresh.
What can I substitute for one ingredient?
If you’re out of unsalted butter, you could use coconut oil instead for a dairy-free option. The texture may slightly change, but it will still work well in this recipe.
Why didn’t my recipe turn out as expected?
Common issues might be due to incorrect measurements or not allowing the filling to firm up. It’s important to follow the steps closely for best results.
Final Thoughts
Making Homemade Peanut Butter Cups is a joyful and straightforward process that brings a sweet satisfaction to your day. They offer a comforting balance of flavors and textures that are sure to please. Enjoy the experience of creating these treats, and rest assured in knowing you can make a delicious dessert for any occasion.
Homemade Peanut Butter Cups
Ingredients
For the Peanut Butter Filling
- 1/2 cup creamy peanut butter smooth texture
- 2 tablespoons unsalted butter adds richness
- 2 tablespoons light brown sugar provides sweetness and moisture
- 1/8 teaspoon salt enhances flavor
- 1/2 teaspoon vanilla extract adds warmth and depth
- 1/2 cup powdered sugar sweetness and binding
For the Chocolate Coating
- 2 cups chocolate melting wafers for coating, smooth melting quality
- 1 teaspoon coconut oil helps with consistency and shine
Instructions
Preparation of Peanut Butter Filling
- Combine the creamy peanut butter and unsalted butter in a medium mixing bowl. Mix until completely blended.
- Add the light brown sugar and salt to the peanut butter mixture. Stir until creamy.
- Mix in the vanilla extract and powdered sugar until achieving a thick, well-combined filling.
Shaping and Freezing
- Prepare a baking sheet lined with wax paper. Scoop rounded amounts of the filling onto the sheet.
- Gently flatten each mound into a disc shape.
- Place the baking sheet in the freezer to firm up the filling for about 30 minutes.
Melting the Chocolate
- Melt the chocolate melting wafers in a microwave-safe bowl in short intervals, stirring between each until fully melted.
- Add the coconut oil to the melted chocolate and stir until smooth.
Dipping and Setting
- Remove the filling from the freezer. Dip each peanut butter cup filling into the melted chocolate, ensuring it is evenly coated.
- Return the dipped peanut butter cups to the baking sheet and let them set at room temperature or in the refrigerator until the chocolate hardens.