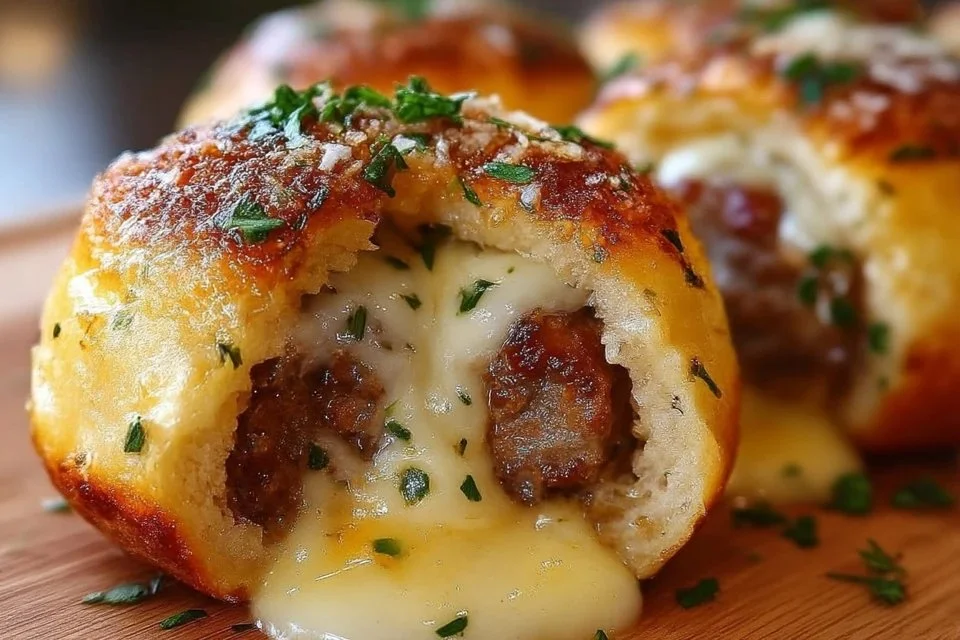
Why You’ll Love This Recipe
This recipe is incredibly easy and reliable, ensuring that everyone will enjoy it. With rich flavors from garlic and Parmesan, these Garlic Parmesan Cheeseburger Bombs offer comfort and balanced taste that appeals to all ages. They are practical and versatile, making them a great addition to your regular meal rotation or for special occasions, ensuring you have a satisfying option on hand whenever the craving strikes.
Kitchen Tools You’ll Need
- Baking sheet
- Mixing bowl
- Spoon
- Oven mitts
- Knife (for mincing garlic)
Ingredients
- 1 lb ground beef (protein)
- 1 cup cheddar cheese, shredded (creaminess)
- 1 can biscuit dough (flakiness)
- 2 tablespoons garlic, minced (aroma)
- 1/4 cup parmesan cheese, grated (saltiness)
- Salt and pepper to taste (flavor enhancement)
- Dipping sauces (optional)
How to Make Garlic Parmesan Cheeseburger Bombs
Step 1
Preheat your oven to 375°F (190°C). Setting the temperature right is essential for ensuring the biscuit dough bakes properly. The oven needs to be fully heated before you begin baking, as this will help achieve that lovely golden color and crispiness on the outside. It’s a good idea to allow at least 10-15 minutes for the oven to warm up fully.
Step 2
In a large mixing bowl, combine the ground beef, minced garlic, salt, and pepper. Use your hands or a spoon to mix the ingredients thoroughly, ensuring the garlic is evenly distributed throughout the meat. This step is crucial because it infuses the beef with flavor. You want a uniform mixture without any dry spots, which can lead to inconsistency in taste.
Step 3
Next, take a small portion of the beef mixture and flatten it out in your palm. Aim for about the size of a golf ball, pressing it gently to make it thin enough to wrap the cheese. This step is key to making the bombs properly. If the beef is too thick, the center may not cook through while the dough is baking, so ensure it’s even and flat.
Step 4
Place a tablespoon of shredded cheddar cheese in the center of the beef patty you just formed. The cheese will melt as the bomb bakes, adding a creamy texture and richness to the filling. Make sure not to overfill the beef with cheese to prevent it from bursting during baking.
Step 5
Carefully fold the beef over the cheese, pinching the edges to seal in the filling. It’s important to secure the seam tightly to keep the cheese from leaking out. If there’s any gap, the steam from the beef can cause it to burst open, so take your time with this step to ensure a nice, sealed package.
Step 6
Once all your beef and cheese portions are formed into balls, take the biscuit dough and split it into individual pieces according to the packaging instructions. Each piece of dough should be large enough to wrap around your beef and cheese ball completely. Aim for a good seal while shaping each piece.
Step 7
Wrap each beef and cheese ball in a piece of biscuit dough, making sure all sides are covered. This adds a delicious, flaky layer that complements the filling. If the dough feels sticky, consider using a little flour on your hands to make the wrapping process easier.
Step 8
Arrange the wrapped balls on a baking sheet, spaced evenly apart to allow room for the dough to rise as it bakes. Keeping space between them helps ensure they cook evenly and don’t stick together. It’s also a great chance to double-check that they’re all sealed well.
Step 9
Sprinkle the grated Parmesan cheese over the tops of each biscuit-wrapped ball before placing the baking sheet in the preheated oven. Adding the Parmesan at this stage allows it to melt and provide a savory, cheesy crust as they bake. This extra layer adds a depth of flavor and a nice finish to your bombs.
Step 10
Bake in the preheated oven for about 15-20 minutes or until the dough is golden brown. Keep an eye on the bombs; they are ready when the tops are nicely colored and the biscuit is cooked through. A good indicator is when you can smell the fragrant garlic and cheese wafting from the oven.
Step 11
Once baked, remove the Garlic Parmesan Cheeseburger Bombs from the oven and allow them to cool for a few minutes. This cooling period helps prevent burns and gives time for the flavors to settle. You’ll notice the aroma is enticing and the cheese inside may still be steaming.
Step 12
Serve the bombs warm, optionally with your choice of dipping sauces on the side. Popular choices include ketchup or ranch dressing, but feel free to enjoy them plain as well. The combination of the rich filling and fluffy dough makes for a satisfying bite every time.
Step 13
When ready for leftovers, allow any uneaten bombs to cool completely before storing them. They can be kept on the counter for short periods, or you can refrigerate them in an airtight container for a couple of days. Enjoy them as they are or reheated.
Serving Suggestions
These Garlic Parmesan Cheeseburger Bombs are versatile and can be enjoyed in various contexts. They’re perfect for breakfast, providing a hearty start to the day. As a snack, they are satisfying between meals or ideal for watching a game. For family dinners, pair with fresh salads or vegetables. Leftovers can be easily reheated for a quick meal anytime, making them an excellent option for busy weeknights.
Pro Tips for Best Results
- Don’t Overmix the Beef: Mixing too much can make the texture tough. Aim for just enough blending.
- Ensure a Good Seal: Always check that the biscuit dough encases the filling fully to prevent leaks during baking.
- Watch Baking Time: Ovens can vary; keep an eye on the bombs as they approach the end of the baking time.
- Experiment with Dips: Try different dipping sauces to add variety, such as spicy mustard or salsa.
- Use Fresh Ingredients: Fresh garlic and quality cheese can significantly enhance flavor, so choose these carefully.
- Adjust Seasoning: Taste your beef mixture before forming the balls; you can tweak the salt and pepper to your liking.
Common Mistakes to Avoid
- Using Cold Beef: Starting with cold beef can make it tougher to mix and form into balls. Always let it sit at room temperature for a bit.
- Overfilling: Putting too much cheese inside can lead to messy spills during baking. Use just a tablespoon of cheese for a good balance.
- Skipping the Preheat: Baking in a cold oven can lead to uneven cooking. Always preheat to achieve that perfect golden crust.
- Not Sealing Properly: Leaving gaps in the dough wrapping can cause the bombs to burst while baking. Make sure they’re snugly wrapped.
- Ignoring Texture: Baking for too long can dry out the biscuit. Keep a close watch on the time to maintain dough softness.
- Poor Storage: Storing them without cooling can create sogginess. Always let them cool completely before storing to preserve texture.
Variations & Substitutions
Try varying the cheese by using pepper jack for a spicy kick or mozzarella for a milder flavor. Ground turkey or chicken can also replace beef for a different protein option. For a veggie spin, consider incorporating finely chopped mushrooms or bell peppers into the beef mixture to add depth of flavor and texture.
Storage & Reheating
Room-temperature storage is fine for a few hours, but for longer-term needs, transfer leftovers to the refrigerator in an airtight container. They can last about 2-3 days this way. If you want to freeze them, place cooled bombs in a freezer-safe bag for up to a month. Reheat in the oven at 350°F (175°C) for about 10-15 minutes; this maintains their crispy exterior while ensuring the filling is warmed through.
Nutrition Information
Nutrition values are estimates and may vary based on ingredients used.
Frequently Asked Questions
Can I make this recipe ahead of time?
Yes, you can prepare the Garlic Parmesan Cheeseburger Bombs in advance and refrigerate them before baking. Just assemble them, cover tightly, and store until you’re ready to cook.
How long does it last in the fridge?
These bombs can last for about 2-3 days in the refrigerator if kept stored properly in an airtight container.
Can I freeze this recipe?
Absolutely! You can freeze unbaked bombs. Just place them on a baking sheet, freeze until solid, then transfer them to a freezer-safe bag for up to a month.
What can I substitute for one ingredient?
For the ground beef, ground turkey or chicken can be used instead for a leaner option. You can also swap cheddar for your favorite melting cheese, like Monterey Jack.
Why didn’t my recipe turn out as expected?
Common issues include undercooked dough from incorrect oven temperature or ingredients that weren’t mixed well. Make sure you follow the steps closely for the best results.
Final Thoughts
Making Garlic Parmesan Cheeseburger Bombs is a straightforward yet rewarding cooking experience that results in tasty, satisfying bites perfect for any occasion. The blend of flavors and textures creates a comforting dish that everyone can enjoy. Remember, cooking should be fun, so don’t worry too much about perfection; the enjoyment comes from sharing and savoring your creations.

Garlic Parmesan Cheeseburger Bombs
Ingredients
Main Ingredients
- 1 lb ground beef Protein base for the bombs.
- 1 cup cheddar cheese, shredded Provides creaminess.
- 1 can biscuit dough Forms the outer layer.
- 2 tablespoons garlic, minced Adds aromatic flavor.
- 1/4 cup parmesan cheese, grated For sprinkling on top.
- salt and pepper to taste Enhances flavor.
- Dipping sauces (optional) Such as ketchup or ranch.
Instructions
Preparation
- Preheat your oven to 375°F (190°C) for 10-15 minutes.
- In a large mixing bowl, combine the ground beef, minced garlic, salt, and pepper. Mix thoroughly.
- Take a small portion of the beef mixture and flatten it out in your palm.
- Place a tablespoon of shredded cheddar cheese in the center of the flattened beef patty.
- Fold the beef over the cheese, pinching the edges to seal.
- Split the biscuit dough into individual pieces.
- Wrap each beef and cheese ball in a piece of biscuit dough.
- Arrange the wrapped balls on a baking sheet, leaving space between them.
- Sprinkle grated Parmesan cheese over the tops of each ball.
Baking
- Bake in the preheated oven for about 15-20 minutes, or until golden brown.
- Allow the bombs to cool for a few minutes before serving.
Serving
- Serve warm with optional dipping sauces.