Hi, I’m Anna. I’m 30 years old and based here in the United States, and for as long as I can remember, food has been my way of connecting with people I care about. Tonight, I finally made a recipe I pinned months ago the kind I always imagined sharing with my family. As the rich, sweet aroma filled my kitchen, it reminded me of simpler times, warm smiles, and cozy evenings together. If you’ve saved this one too, make it tonight and tell me how it turns out.
Why You’ll Love This The Best Gluten-Free Cheesecake Brownies Recipe
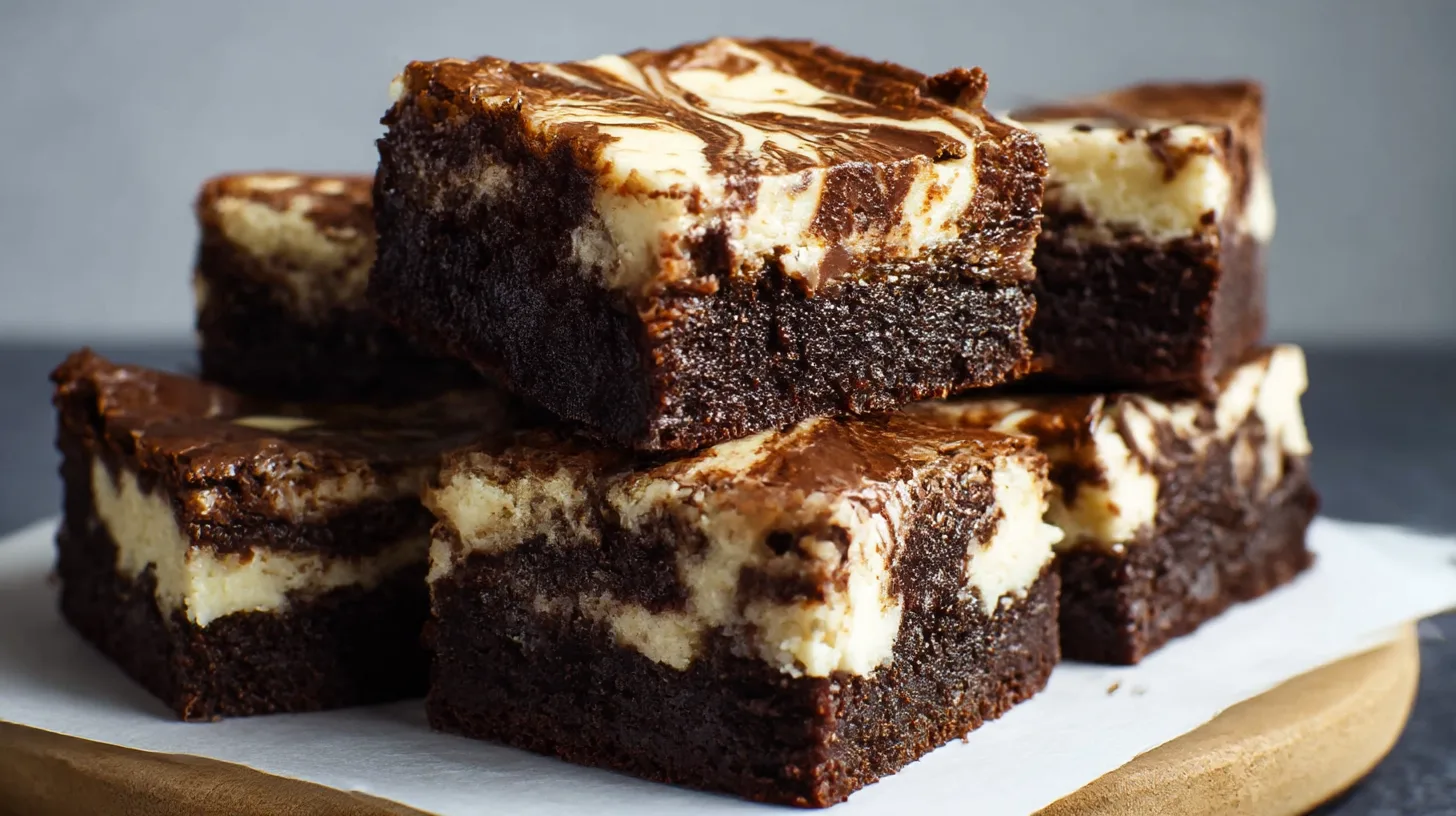
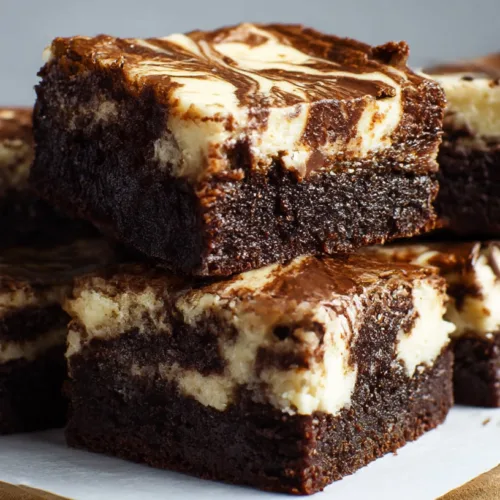
It’s simple, satisfying, and indulgent — everything you want in a dessert. These easy gluten-free cheesecake brownies combine two classics: brownies and cheesecake, into one flawless treat. They’re perfect for sharing, gifting, or freezing for later (though good luck making them last that long).
Beyond being decadent, they’re also customizable. You can add nuts, swirl in berry jam, or even layer the cheesecake thinner if you prefer more chocolate than cream. Whether you’re gluten-free or not, this recipe proves that homemade desserts don’t need compromise — just love and butter.
Ingredients
For the Cream Cheese Filling
- 2 (8 oz) packages cream cheese – use full-fat brick-style for the creamiest texture
- 2/3 cup white sugar – adds the perfect sweetness to balance the tang
- 2 eggs – gives the filling structure and silkiness
- Optional: chocolate chips – for extra melty pockets of chocolate joy
For the Brownie Batter
- 1 cup butter (2 sticks) – creates that rich, fudgy base
- 2 cups white sugar – sweetens and deepens flavor when baked
- 4 eggs – bind everything and keep the brownies moist
- 1/4 tsp salt – enhances the chocolate flavor
- 1 cup cocoa – brings that deep, dark chocolate goodness
- 1 cup all-purpose gluten-free flour (or regular flour) – ensures the perfect texture
- Optional: chopped walnuts – for crunch and a nutty contrast
Directions
- Preheat the oven to 350°F. Line a baking pan with parchment paper or lightly grease it so nothing sticks.
- Make the cheesecake filling: In a large bowl, beat cream cheese, sugar, and eggs until smooth and creamy. You want no lumps — just a silky, pale mixture.
- Make the brownie batter: In a separate bowl, cream together the butter, sugar, eggs, and salt using a hand or stand mixer until fluffy.
- Add cocoa and nuts (if using): Stir in by hand until glossy and fully incorporated.
- Add the flour: Mix until the batter is smooth, thick, and rich. Try not to overmix — that keeps your brownies tender.
- Assemble the layers: Pour most of the brownie batter into the prepared pan, saving a few spoonfuls for swirling later. Spread evenly.
- Add the cheesecake layer: Pour the cream cheese mixture over the brownie base and smooth it out gently to the edges.
- Swirl the magic: Thin the remaining brownie batter with a spoonful of water, then dollop it over the cheesecake layer. Use a knife, fork, or toothpick to create beautiful chocolate swirls.
- Bake: Slide into the oven and bake for 35–40 minutes, until the center looks set and a toothpick comes out mostly clean.
- Cool and enjoy: Let the brownies cool completely before cutting into squares. Store in an airtight container to keep them moist and fudgy.
Cultural or Technique Note
These brownies are a beautiful fusion of American-style fudge brownies and classic New York cheesecake. The technique of swirling the two batters together gives that signature marbled look and creates an irresistible texture contrast — dense chocolate meeting creamy tang in every bite.
Serving Suggestions
These gluten-free cheesecake brownies are so versatile, you can enjoy them a dozen different ways. Each bite is rich, creamy, and chocolatey — and these serving ideas make them even more irresistible:
- With a dusting of powdered sugar and fresh berries: The sweetness of the brownie pairs beautifully with the tart pop of raspberries, strawberries, or blueberries. It’s a simple, elegant touch that makes them look bakery-worthy.
- Alongside a scoop of vanilla or coffee ice cream: The contrast of warm, fudgy brownies with cold, creamy ice cream is pure dessert magic. Coffee ice cream especially brings out the depth of the cocoa flavor.
- Crumbled into a parfait with whipped cream: For a fun twist, layer brownie pieces with whipped cream and fruit in a glass jar — perfect for parties or make-ahead desserts.
- As an afternoon treat with coffee or tea: These brownies taste even better after they’ve chilled overnight, making them a wonderful midday pick-me-up. The cheesecake layer gives just enough tang to balance a rich drink.
- With a drizzle of melted chocolate or caramel: For an indulgent finish, melt a little chocolate or caramel and drizzle it over the top right before serving. It adds shine, sweetness, and a beautiful touch.
Pro Tips for Success
A few small tweaks make the difference between good brownies and unforgettable brownies. Keep these tips in mind while baking:
- Use brick-style cream cheese, not whipped. It’s firmer, creamier, and helps the cheesecake layer bake up perfectly smooth.
- Don’t overmix the batter. Stir just until everything comes together — overmixing can lead to a dry or cakey texture.
- Cool completely before slicing. The layers need time to set so your cuts are clean and pretty. Use a sharp knife and wipe between slices.
- Melt butter gently before mixing. This gives the brownie batter a shiny, glossy finish and enhances that fudgy texture.
- Swirl lightly. A few gentle turns of a knife or skewer create those gorgeous marbled patterns — too much swirling will blur the layers.
- Chill before serving. If you love dense, fudgy brownies with a creamy bite, refrigerate them for a few hours before eating. They’re heavenly cold.
- Use quality cocoa powder. The deeper the cocoa flavor, the richer the brownies — it’s worth it!
Common Mistakes to Avoid
Even simple recipes have little traps — here’s how to sidestep them:
Using low-fat cream cheese: Low-fat versions add extra moisture, making the filling runny. Stick with full-fat for best results.
Overbaking: Brownies continue cooking as they cool. Take them out when the center is just set for that gooey, fudgy middle.
Skipping parchment paper: Always line your pan! It prevents sticking and makes lifting the brownies out effortless.
Overmixing flour: Fold it in gently to avoid a tough or dry texture.
Not cooling fully: Cutting too soon can cause the cheesecake layer to smudge and the brownies to crumble. Patience pays off!
Using the wrong flour blend: Always go for a trusted 1:1 gluten-free flour for consistent results and proper texture.
Storage & Reheating
Fridge: Store brownies in an airtight container for 3–4 days. The cool temperature keeps the cheesecake layer firm and the chocolate dense and moist.
Freezer: These brownies freeze beautifully! Wrap tightly and store airtight for up to 2 months. Thaw overnight in the fridge before serving.
Reheat: Enjoy chilled or at room temperature. If you prefer them warm, heat gently in the microwave or oven on low heat for just a few seconds — enough to soften but not melt the cheesecake layer.
Frequently Asked Questions
Q1: Can I make these brownies with regular flour?
Absolutely! Just replace the gluten-free flour with your favorite all-purpose flour. The texture will be slightly denser but equally delicious.
Q2: Can I add fruit or nuts to the recipe?
Yes! Swirl in a spoonful of raspberry jam, fold in chopped walnuts, or sprinkle in chocolate chips for extra richness and crunch.
Q3: How can I make the cheesecake layer thinner?
Simply cut the cheesecake ingredients in half for a lighter layer that ribbons through the brownies instead of sitting on top.
Q4: Do these brownies need to be refrigerated?
Yes, because of the cream cheese layer. Store them in the fridge and serve chilled for the best flavor and texture — they’re divine cold!
Q5: Can I freeze them for later?
: Definitely! These brownies freeze beautifully and taste just as good once thawed. Wrap each square individually for quick grab-and-go desserts.
Closing Paragraph
These homemade gluten-free cheesecake brownies are everything a dessert should be — chocolatey, creamy, and melt-in-your-mouth indulgent. Whether you bake them for family gatherings, school treats, or just to spoil yourself, they’ll be gone in no time. Make them once, and you’ll never reach for boxed brownie mix again.
Final Thoughts
When I bake these brownies, my kitchen fills with the scent of melted butter and chocolate — the kind of smell that makes everyone wander in asking, “What’s in the oven?” They remind me that comfort doesn’t have to be complicated, just made with love. I hope these gluten-free cheesecake brownies bring the same joy to your home as they do to mine.
Gluten-Free Cheesecake Brownies
Equipment
- Mixing Bowls
- Hand or stand mixer
- 9×13 Baking Pan
- Parchment Paper
Ingredients
Cream Cheese Layer
- 16 oz cream cheese full-fat, brick-style
- 2/3 cup white sugar
- 2 eggs room temperature
- chocolate chips optional
Brownie Batter
- 1 cup butter 2 sticks, melted
- 2 cups white sugar
- 4 eggs room temperature
- 1/4 tsp salt
- 1 cup cocoa powder unsweetened
- 1 cup gluten-free flour 1:1 baking blend or regular flour
- chopped walnuts optional
Instructions
- Preheat oven to 350°F. Line a 9×13 pan with parchment paper or lightly grease it.
- In a bowl, beat cream cheese, sugar, and eggs until smooth and creamy. Stir in chocolate chips if using. Set aside.
- In another bowl, cream butter, sugar, eggs, and salt until fluffy.
- Add cocoa and optional walnuts; stir until glossy.
- Mix in gluten-free flour until smooth and thick. Don’t overmix.
- Spread most of the brownie batter into the pan. Reserve a few spoonfuls for swirling.
- Pour cheesecake filling over brownie layer. Smooth gently to edges.
- Thin reserved brownie batter with water. Dollop on top and swirl with a knife or skewer.
- Bake for 35–40 minutes until center is just set. A toothpick should come out mostly clean.
- Cool completely before slicing. Store in an airtight container in the fridge.