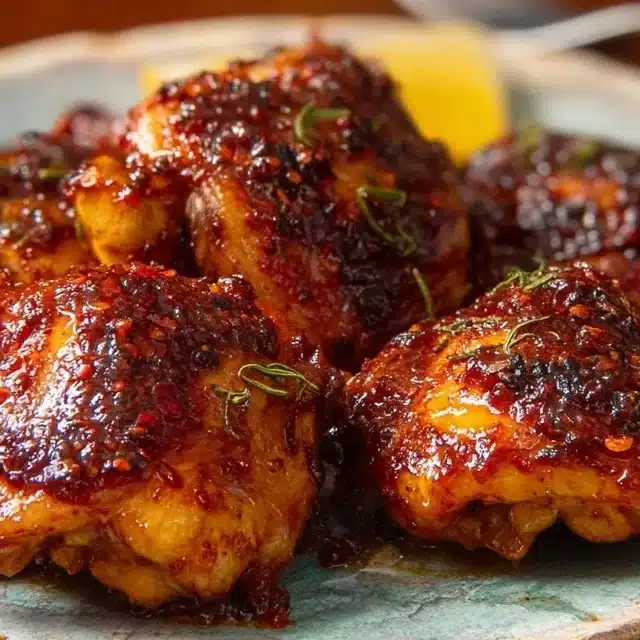

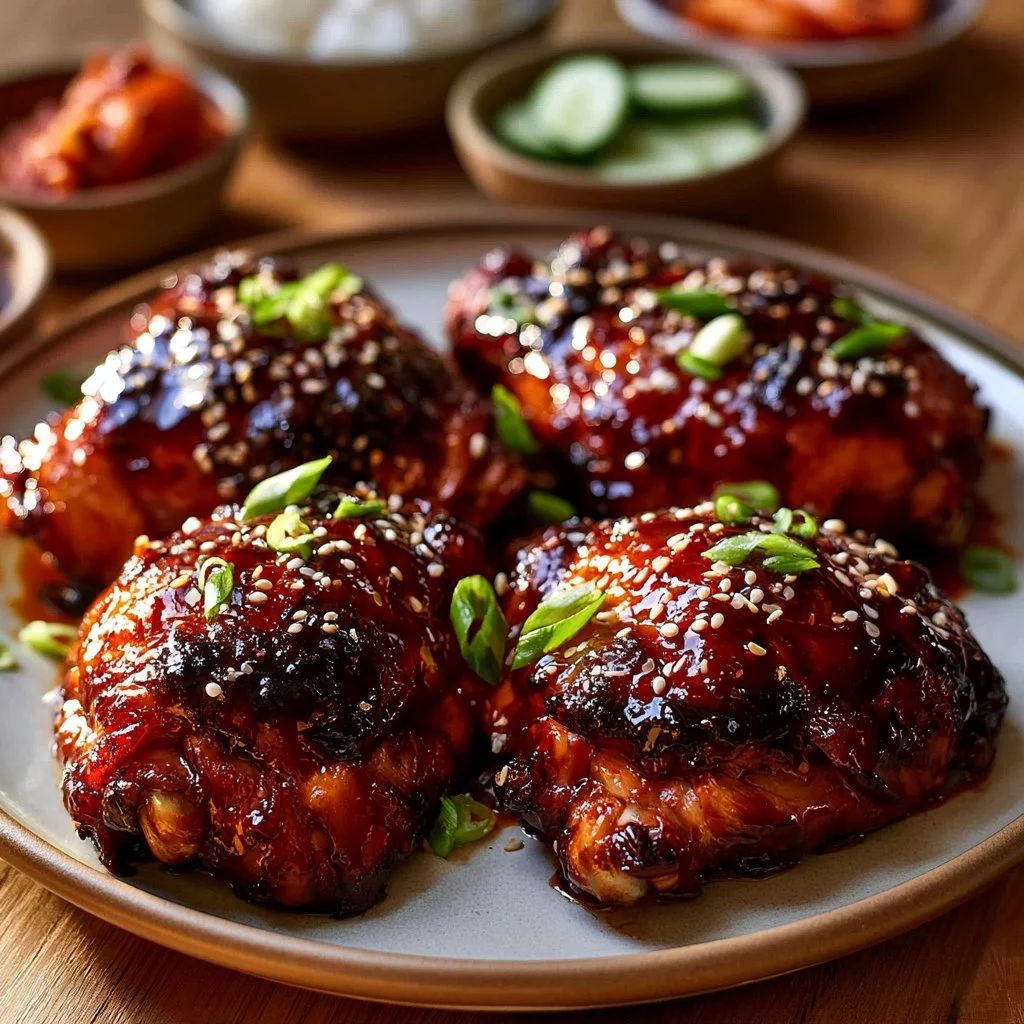
There’s something wonderfully satisfying about a dish that’s both simple to prepare and full of flavor. This sticky Korean gochujang chicken is just that. It’s a fantastic choice for busy weeknights or a cozy weekend meal, making it suitable for gatherings or quiet moments at home. Its balance of spice and sweetness, complemented by the savory notes of garlic and ginger, brings warmth and comfort to the table. Let’s dive into how to make this easy and reliable dish.
Why You’ll Love This Sticky Korean Gochujang Chicken Thighs
This recipe offers ease and reliability, perfect for busy days when you want a comforting meal without a lot of fuss. The balanced flavors of gochujang, honey, and soy sauce create a delicious glaze that enhances the rich chicken thighs. It’s a practical option for everyday cooking, yielding a dish that’s both satisfying and dependable for family meals or casual get-togethers.
Kitchen Tools You’ll Need
- Baking sheet
- Mixing bowl
- Whisk
- Brush
- Foil
Ingredients
- 2 lbs bone-in skin-on chicken thighs (about 6)
- 3 tbsp gochujang Korean chili paste (adds a spicy, fermented flavor)
- 2 tbsp soy sauce (provides saltiness and depth of flavor)
- 2 tbsp honey or maple syrup (adds sweetness and glossiness)
- 1 tbsp sesame oil (infuses a nutty aroma)
- 2 cloves garlic minced (brings aromatic depth)
- 1 tsp grated fresh ginger (adds warmth and spice)
- 1 tbsp rice vinegar (provides acidity to balance flavors)
- 1 tbsp vegetable oil (helps with browning the chicken)
- 1 tsp toasted sesame seeds (adds crunch and presentation)
- Sliced green onions for garnish (brings freshness and color)
How to Make Sticky Korean Gochujang Chicken Thighs
Step 1. In a mixing bowl, combine the gochujang, soy sauce, honey, sesame oil, minced garlic, grated ginger, and rice vinegar. Use a whisk to blend everything together until you achieve a smooth and well-mixed sauce. The colors should blend, and the sauce should feel slightly thick, ready to adhere well to your chicken.
Step 2. Pat the chicken thighs dry using paper towels, which is essential for ensuring that the skin crisps up nicely. Rub a small amount of vegetable oil over each thigh to help with browning and moisture retention. Lightly season both sides with salt, aiming for just enough to enhance the natural flavor of the chicken.
Step 3. Arrange the chicken thighs on a baking sheet lined with foil, placing them skin-side up. This setup allows the fat to render as they cook and helps achieve that desirable crispy texture. Be sure there’s some space between the thighs to allow hot air to circulate properly, promoting even cooking.
Step 4. Take half of the sauce you prepared and brush it generously over the tops of the chicken thighs. This coating will help form the sticky glaze as they roast. It should look shiny and well-covered, indicating that the chicken will absorb those flavors as it cooks.
Step 5. Roast the chicken in the oven at 425°F until it cooks through and the skin is golden brown, about 20 minutes. You’re looking for a nice char on the skin, signaling that the flavors are concentrating as the chicken releases some juices. The thighs should be fragrant and enticing during this time.
Step 6. Once the roasting period is complete, turn the broiler to high. This quick, intense heat will help caramelize the sauce beautifully. Brush the remaining sauce over the chicken and then place it back in the oven under the broiler for an additional 3 to 5 minutes. Watch closely for bubbles and slight charring around the edges, signaling that it’s ready.
Step 7. After broiling, take the baking sheet out of the oven and let the chicken rest for about 5 minutes. This resting period allows the juices to redistribute within the meat, ensuring each bite remains juicy. You’ll notice the glaze has a stickier consistency as it cools slightly.
Step 8. Finally, sprinkle toasted sesame seeds over the chicken and add sliced green onions for a touch of color and freshness. This will enhance the presentation and add a pleasant crunch to the dish just before serving.
Serving Suggestions
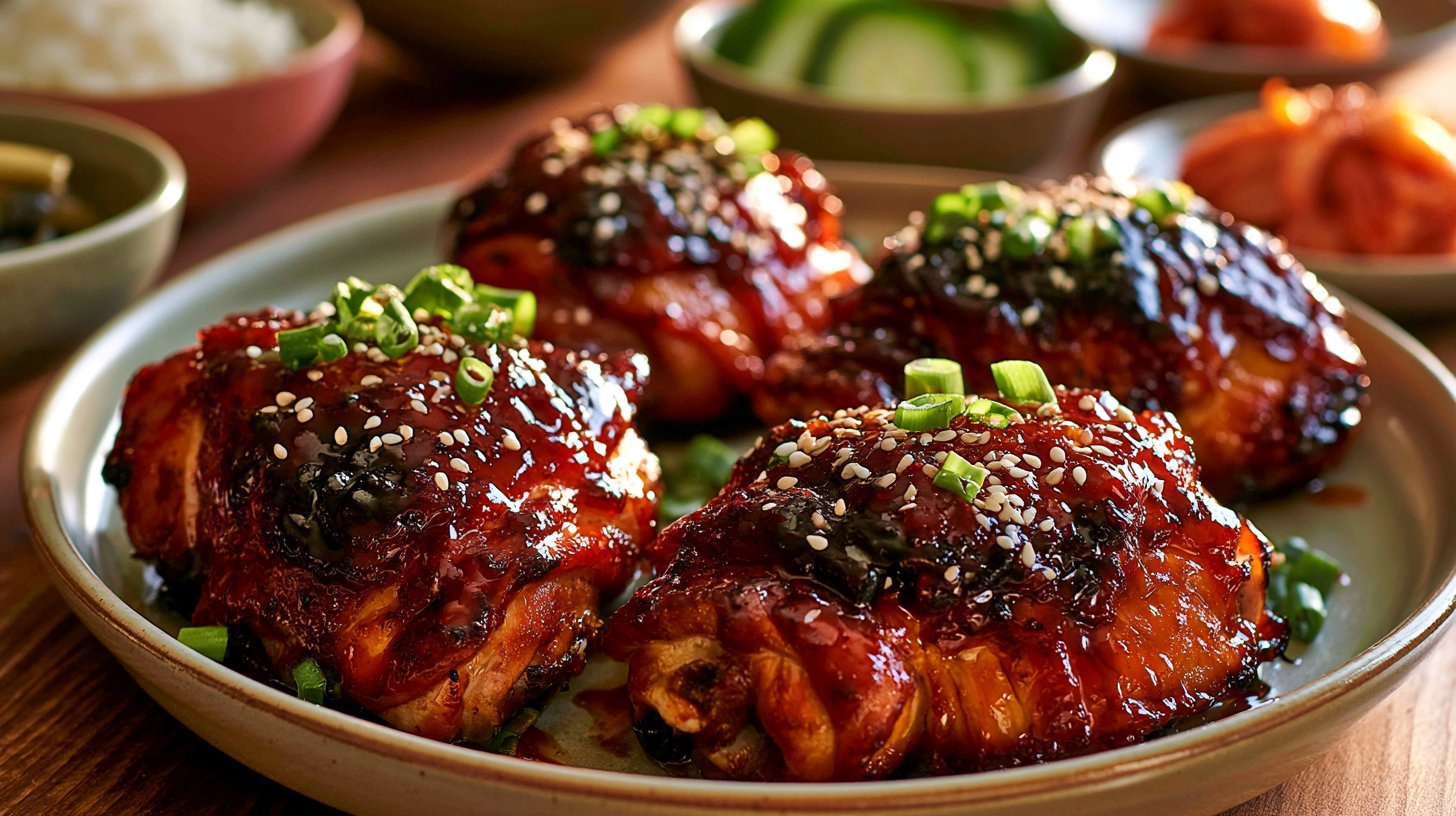
Sticky Korean gochujang chicken thighs work well in various meal settings. For a hearty family dinner, serve them alongside steamed rice and sautéed vegetables to soak up the flavorful glaze. They can also be enjoyed as leftovers, perhaps diced into a salad for lunch or served with a side of kimchi for a quick snack. The chicken’s rich flavor makes it versatile enough for any time of day, even for breakfast when paired with scrambled eggs.
Pro Tips for Best Results
- Dry the Chicken Well: Ensuring the chicken is well dried before cooking helps achieve crispy skin, which enhances the dish’s overall texture.
- Even Spacing: Arrange the chicken with space between each piece on the baking sheet. This allows for even cooking and skin crisping.
- Monitor While Broiling: Keep an eye on the chicken while it’s under the broiler, as it can quickly go from perfectly charred to burnt.
- Use Fresh Ingredients: Fresh ginger and garlic elevate the dish’s flavor profile. Using fresh ingredients contributes to a more vibrant taste.
- Let It Rest: Allowing the chicken to rest after cooking helps ensure it’s juicy and tender, making the eating experience much more enjoyable.
- Adjust the Spice: If you’re sensitive to heat, feel free to decrease the amount of gochujang. The flavor will still shine through without overwhelming heat.
Common Mistakes to Avoid
- Skipping the Drying Step: Neglecting to dry the chicken can result in soggy skin rather than the crispy texture you desire. Always pat those thighs dry before cooking.
- Overcrowding the Baking Sheet: Placing too many chicken thighs too close together can prevent them from crisping up properly. Give them room to breathe to ensure even cooking.
- Not Letting the Chicken Rest: Cutting into the chicken immediately after cooking makes juices escape. Letting it rest allows the meat to become more tender and juicy.
- Rushing the Broiling Process: Broiling requires close attention because it can cook quickly. If you walk away for too long, you may end up with burnt edges instead of a beautiful glaze.
- Using Low-Quality Ingredients: Since the flavors are concentrated, using fresh and high-quality ingredients like good soy sauce and pure honey will greatly enhance the overall taste of the dish.
- Ignoring Flavor Balance: Make sure to adjust seasoning if you find it too salty or sweet; tasting your sauce beforehand can help achieve a well-balanced final dish.
Variations & Substitutions
You can play with the flavors in this recipe while staying close to the original. For instance, adding a splash of lime juice could enhance the brightness of the dish. If you’d like to add a bit of crunch, consider tossing some thinly sliced carrots or bell peppers into the baking sheet with the chicken.
Storage & Reheating
To store, let the chicken cool before transferring it to an airtight container, and it can be kept in the refrigerator for up to three days. If you have leftovers, they can be frozen for up to two months. For reheating, place the chicken back in an oven set to 350°F to maintain the crispy texture, covering it loosely with foil to avoid drying out.
Frequently Asked Questions
Can I make this recipe ahead of time?
Yes, you can prepare the marinade and coat the chicken thighs up to a day in advance. Just store the chicken in the marinade in the refrigerator until ready to bake. This helps the flavors develop further.
How long does it last in the fridge?
The cooked chicken can be stored in the refrigerator for about three days in an airtight container. Just make sure it cools completely before sealing to maintain the best texture.
Can I freeze this recipe?
Yes, you can freeze the cooked chicken for up to two months. Wrap it tightly in foil or use a freezer-safe container to prevent freezer burn, ensuring it remains flavorful when reheated.
What can I substitute for one ingredient?
If you don’t have gochujang, you could use another chili paste in a pinch, but be mindful of the flavor and heat level. Adjust the amount based on your preference to keep the balance intact.
Why didn’t my recipe turn out as expected?
There could be a few factors: the chicken may not have been dried properly, which affects crispness, or perhaps the broiler was too close to the chicken. Always keep an eye on the cooking process to ensure everything goes smoothly.
Final Thoughts
Making sticky Korean gochujang chicken thighs is an enjoyable process that yields a comforting and flavorful meal. It’s a delightful combination of sweet, spicy, and savory elements that is sure to satisfy. With simple steps and readily available ingredients, this recipe is accessible for anyone looking to bring some warmth to their kitchen. Enjoy the process, and trust that the results will be well worth it.
Sticky Korean Gochujang Chicken Thighs
Ingredients
Main Ingredients
- 2 lbs bone-in skin-on chicken thighs About 6 pieces
Sauce Ingredients
- 3 tbsp gochujang Korean chili paste Adds a spicy, fermented flavor
- 2 tbsp soy sauce Provides saltiness and depth of flavor
- 2 tbsp honey or maple syrup Adds sweetness and glossiness
- 1 tbsp sesame oil Infuses a nutty aroma
- 2 cloves garlic, minced Brings aromatic depth
- 1 tsp grated fresh ginger Adds warmth and spice
- 1 tbsp rice vinegar Provides acidity to balance flavors
- 1 tbsp vegetable oil Helps with browning the chicken
- 1 tsp toasted sesame seeds Adds crunch and presentation
- to taste sliced green onions for garnish Brings freshness and color
Instructions
Preparation
- In a mixing bowl, combine the gochujang, soy sauce, honey, sesame oil, minced garlic, grated ginger, and rice vinegar. Whisk until smooth and well mixed.
- Pat the chicken thighs dry with paper towels, then rub a small amount of vegetable oil over each thigh and lightly season with salt.
Cooking
- Arrange the chicken thighs skin-side up on a baking sheet lined with foil, ensuring space between each piece.
- Brush half of the prepared sauce over the tops of the chicken thighs.
- Roast the chicken in the oven at 425°F until cooked through and the skin is golden brown, approximately 20 minutes.
- Turn the broiler to high and brush the remaining sauce over the chicken. Broil for an additional 3 to 5 minutes, watching closely.
- Remove the chicken from the oven and let it rest for about 5 minutes.
- Sprinkle toasted sesame seeds and sliced green onions over the chicken before serving.