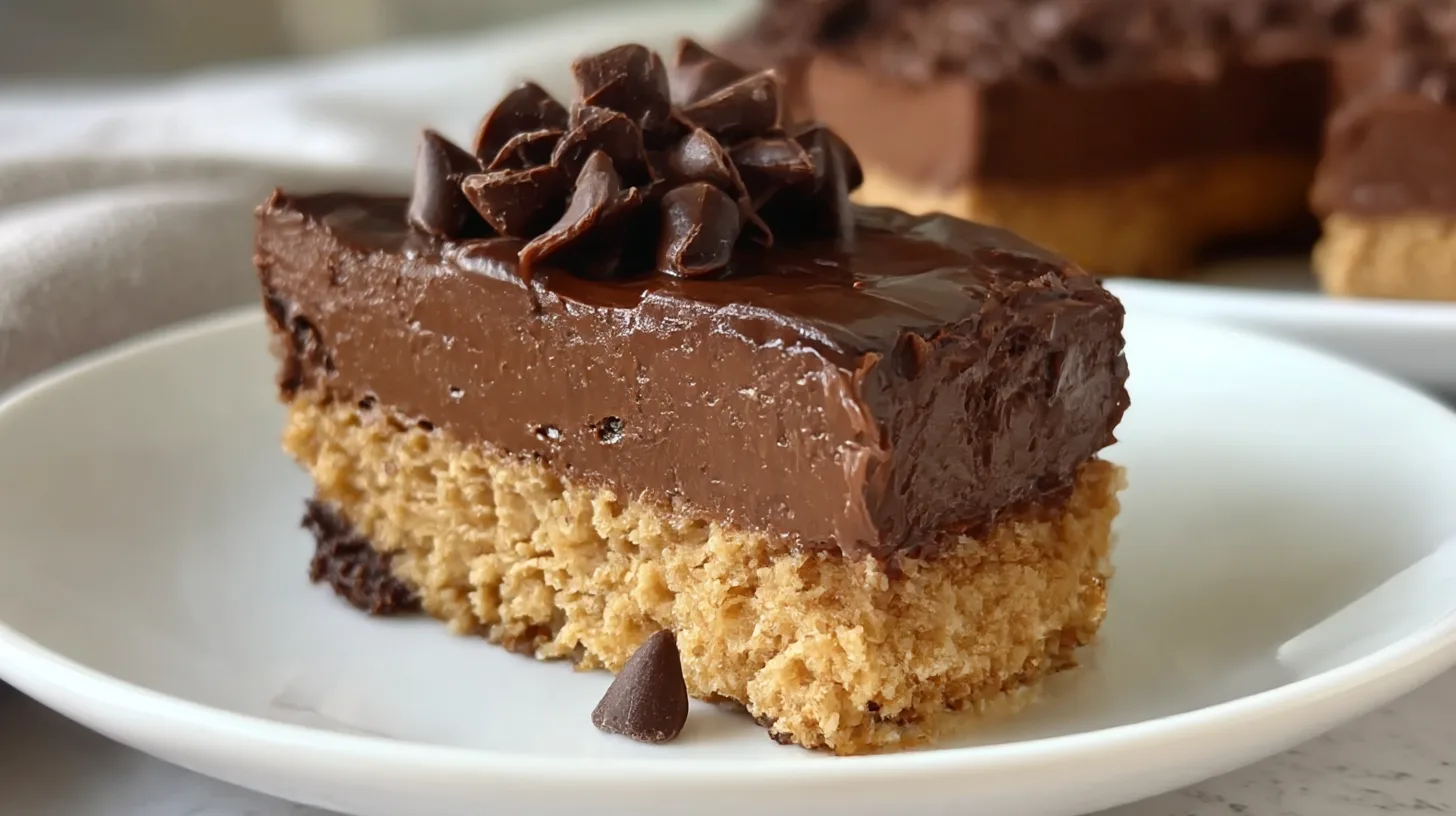
Hi, I’m Anjalina, a 28-year-old from the UK who never imagined that the kitchen would become my favourite place to laugh, experiment, and sometimes make a little mess. I stumbled upon this recipe in an Instagram Reel, and wow those glossy peanut butter layers and shiny chocolate drizzle had me instantly craving it. It looked so easy, rich, and dangerously moreish. Try it yourself and tag me I’d love to see your version of this beauty!
Why You’ll Love This Dessert Recipe
Loved by both kids and adults, these dairy free dessert bars are the ultimate fuss-free treat. They’re quick to make, allergy friendly, and taste just like the classic Oh Henry bars — without the gluten or dairy. Perfect for bake sales, potlucks, school events, or cozy family nights, they travel well, hold up beautifully, and always disappear fast.
Ingredients
- ¾ cup granulated sugar – adds sweetness and helps the mixture hold together.
- 1 cup white Karo syrup – gives these bars that chewy, gooey texture.
- 1 cup creamy peanut butter – smooth and rich, the heart of this recipe.
- 6 cups gluten free rice krispie cereal – provides that signature crisp crunch; Nature’s Path is a great option.
- 20 ounces dairy free semisweet chocolate chips – Enjoy Life brand melts perfectly for a glossy, rich top layer.
- Optional: chopped nuts – for a little extra texture and nutty flavor on top.
Step-by-Step Directions
- Heat and mix: In a medium saucepan, combine the sugar and Karo syrup. Bring to a gentle boil, stirring until the sugar dissolves completely. Remove from heat and quickly stir in the peanut butter until smooth.
- Add the cereal: Pour the rice krispie cereal into the warm peanut butter mixture. Stir until every crispy piece is well coated and glossy.
- Press the mixture: Transfer the mixture to a 9×13-inch pan. Press it down evenly with a spatula or clean hands. You’ll feel it begin to firm up as it cools — that’s a good sign!
- Melt the chocolate: In a small saucepan over low heat (or in the microwave in short bursts), melt the dairy free chocolate chips, stirring frequently until smooth.
- Top it off: Pour the melted chocolate over the peanut butter cereal base, spreading it evenly to the edges.
- Set and cut: Allow the bars to set at room temperature until the chocolate firms up, then cut into squares or rectangles.
- Optional finish: Sprinkle chopped nuts over the chocolate before it sets for extra crunch.
Cultural or Technique Note
These Oh Henry Bars are a nostalgic American treat — the kind of dessert that’s been shared at family picnics, potlucks, and bake sales for decades. The no-bake method captures that classic homemade charm while being incredibly simple, making it a favorite among busy families and beginner bakers alike.
Serving Suggestions
These Oh Henry Bars are versatile, fun, and fit into nearly any occasion. Here are a few delicious ways to enjoy them:
- With a glass of almond or oat milk: The creamy, cool milk complements the chewy peanut butter and smooth chocolate, making it a perfect after-school or evening snack.
- Packed in lunchboxes or picnic baskets: These bars don’t melt easily and travel beautifully, making them ideal for school treats or sunny park picnics.
- On a dessert tray for holidays or birthdays: Their glossy chocolate tops add a little shine to any dessert spread, and they’re always the first to disappear.
- Crumble over ice cream: A fun, crunchy topping for coconut or vanilla ice cream — it’s like an instant sundae upgrade.
- Wrapped as homemade gifts: Stack a few squares in parchment and tie with twine for a charming gluten and dairy free gift that feels homemade and heartfelt.
- Served alongside coffee or tea: A sweet mid-afternoon pick-me-up when you want just a touch of indulgence.
Pro Tips for Success
Mastering these dairy free dessert bars is easy with a few insider tricks:
- Stir quickly once you add the peanut butter. The syrup cools fast, so move fast for an even, glossy mix.
- Line your pan with parchment paper. It makes cleanup easy and gives you perfect, neat slices every time.
- Melt the chocolate slowly. Low heat prevents burning and keeps your chocolate shiny and smooth.
- Swirl two types of chocolate. For an elegant look, try combining dark and semisweet chips for a marbled effect.
- Let bars cool completely. Cutting them too soon causes the layers to pull apart — patience pays off here.
- Stock up on dairy free chocolate chips when they’re on sale. They’re a lifesaver for quick, allergy-friendly desserts anytime.
- Keep your tools ready. Once you start mixing, things move fast, so have your pan and spatula nearby before heating the syrup.
Common Mistakes to Avoid
Avoid these easy-to-make errors to keep your bars chewy, glossy, and perfect every time:
Overheating the syrup: Once it bubbles, it’s ready — boiling too long makes the bars hard and tough.
Not stirring evenly: Every bit of cereal should be coated in peanut butter mixture to avoid dry patches.
Melting chocolate too fast: Chocolate burns easily; melt slowly with gentle heat and stir often.
Cutting before it sets: The chocolate layer needs time to firm up for clean, pretty slices.
Skipping the airtight container: Leaving them uncovered dries them out and dulls the chocolate finish.
Refrigerating too soon: Let them cool at room temperature first to prevent condensation on the chocolate.
Storage & Reheating
These gluten and dairy free Oh Henry Bars are just as good days later if stored properly:
Fridge: Keep in an airtight container for 3–4 days to maintain freshness and chewiness.
Freezer: Freeze for up to 2 months; layer parchment between bars to keep them from sticking. Let thaw at room temperature before serving.
Reheat: Not needed — they’re best enjoyed straight from the counter or slightly chilled for a firmer texture.
Frequently Asked Questions
When should I serve Oh Henry Bars?
These bars shine at every event! From bake sales and classroom parties to family BBQs or cozy weekends at home, they’re the go-to dessert that requires zero fuss. They also travel well, so no refrigeration or utensils needed — just slice, pack, and go.
Can I make these dessert bars ahead of time?
Absolutely! Prepare them up to 2 days in advance and store at room temperature in a tightly sealed container. Just keep them away from direct sunlight or heat to preserve the chocolate layer.
How should I store leftovers?
Leftovers last up to 4 days in an airtight container at room temperature. You can freeze them, too — simply thaw for 15–20 minutes before serving. The texture may soften slightly, but they’ll still taste amazing.
Can I use other nut butters instead of peanut butter?
Definitely! For a nut free baked goods option, sunflower seed butter or soy nut butter both work beautifully. They mimic the creaminess of peanut butter without any nuts, making these bars safe for classrooms or allergy-friendly events.
Can I make them less sweet?
If you prefer a milder sweetness, use slightly less sugar or pair semisweet chocolate with a darker variety. The balance of salty peanut butter and bittersweet chocolate still gives you that delicious contrast without too much sugar.
Closing Paragraph
These gluten and dairy free Oh Henry Bars are everything you want in a dessert — simple, sweet, and irresistibly chewy. Whether you’re serving them for a celebration or just a cozy night in, they’ll bring smiles all around. Customize them with nuts, seeds, or a mix of chocolate chips, and enjoy every crunchy, chocolatey bite.
Final Thoughts
I can never resist the nostalgia of a homemade Oh Henry Bar — the mix of peanut butter and chocolate takes me right back to childhood. I love how quick these are to make and how everyone lights up when they see them on the table. These are the kind of treats that make any day feel special.

Gluten & Dairy Free Oh Henry Bars
Equipment
- Medium Saucepan
- Spatula
- 9×13-inch pan
- Microwave or stovetop
- Parchment Paper (optional)
Ingredients
Base
- 3/4 cup granulated sugar adds sweetness and helps hold bars together
- 1 cup white Karo syrup for chewy, gooey texture
- 1 cup creamy peanut butter smooth and rich
- 6 cups gluten free rice krispie cereal Nature’s Path recommended
Topping
- 20 ounces dairy free semisweet chocolate chips Enjoy Life brand melts well
- chopped nuts optional, for topping
Instructions
- In a medium saucepan, combine sugar and Karo syrup. Bring to a gentle boil, stirring until sugar dissolves completely.
- Remove from heat and quickly stir in the peanut butter until smooth and glossy.
- Add rice krispie cereal and stir until evenly coated.
- Transfer mixture to a 9×13-inch pan and press down evenly using a spatula or clean hands.
- Melt the chocolate chips slowly over low heat or in the microwave in short bursts, stirring until smooth.
- Pour melted chocolate over the peanut butter cereal base, spreading it to the edges.
- Optionally, sprinkle chopped nuts over the top before the chocolate sets.
- Let the bars set at room temperature until chocolate firms up. Cut into bars and serve.