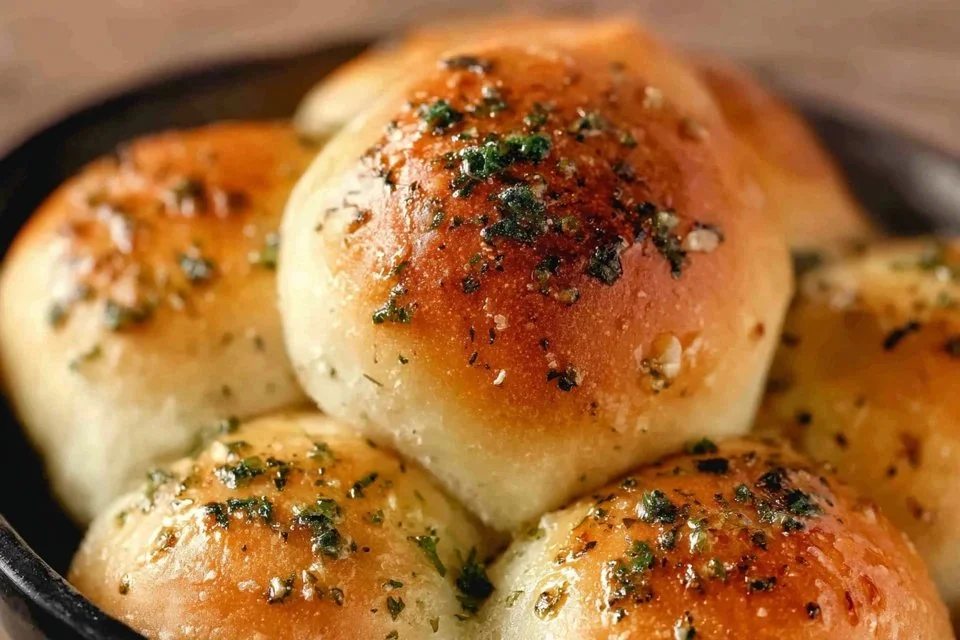
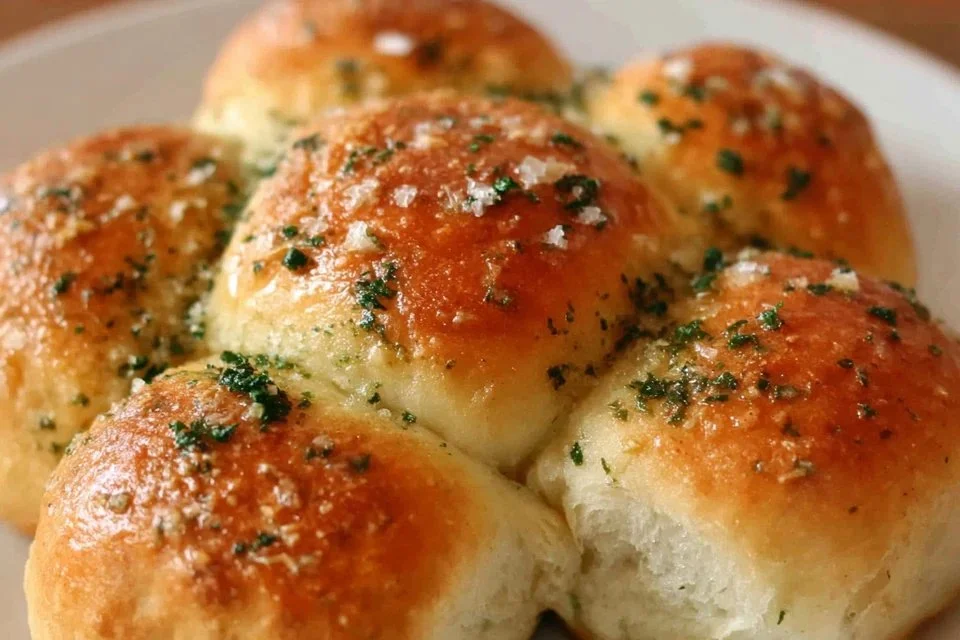
Making homemade Garlic Bread Rolls is a delightful way to elevate meals, whether you’re hosting a weekend gathering or enjoying a quiet evening at home. These rolls are simple to make, providing a comforting addition to any dinner table. They are versatile enough to serve as an appetizer, side dish, or even a snack. The ease of preparation and the inviting aroma will welcome everyone to the table. Let’s dive in and create these lovely rolls together.
Why You’ll Love This Recipe Garlic Bread Rolls
This recipe is easy to follow and consistently reliable, making it a go-to choice for any home cook. You’ll appreciate the comforting blend of flavors from the garlic and butter, which creates a lovely balance in each bite. With their practicality and deliciousness, these Garlic Bread Rolls fit seamlessly into any meal, adding warmth to your everyday dining experience.
Kitchen Tools You’ll Need
- Mixing bowls
- Baking sheet
- Kitchen towel
- Whisk
- Rolling pin
Ingredients
- 4 1/2 tablespoons unsalted butter (adds moisture and richness)
- 2 tablespoons minced garlic (provides strong, savory flavor)
- 3 1/2 cups + 1 tablespoon all-purpose flour (gives structure and texture)
- 3 tablespoons chopped fresh parsley (adds fresh flavor and color)
- 1 tablespoon granulated sugar (helps with browning and flavor)
- 2 1/4 teaspoons instant yeast (aids in leavening the rolls)
- 1 teaspoon fine sea salt (enhances overall flavor)
- 1 cup whole or 2% milk, warmed to 110°F (provides moisture and helps activate yeast)
- 1 large egg, room temperature (binds ingredients)
- 1 beaten egg, for brushing the tops (adds shine and color)
- 2 tablespoons unsalted butter (for garlic butter; adds richness)
- 1 tablespoon minced garlic (for garlic butter; enhances flavor)
- 1 tablespoon chopped fresh parsley (for garlic butter; adds a fresh touch)
- Flaky sea salt, for finishing (adds texture and flavor)
How to Make Garlic Bread Rolls
Step 1. In a large bowl, combine the warm milk and granulated sugar, stirring gently until the sugar is dissolved. Add the instant yeast and let it sit for about five minutes until it becomes foamy. This step ensures that the yeast is active, which is crucial for the rolls to rise properly.
Step 2. Once the yeast is bubbly, add the room temperature egg, melted butter, and fine sea salt to the mixture. Stir until well combined. This creates a wet mixture that helps bind the dough together, ensuring an even distribution of flavors.
Step 3. Gradually mix in the all-purpose flour, starting with a cup at a time. Stir until the dough begins to come together. Watching for a shaggy texture indicates that you have the right amount of flour.
Step 4. Turn the dough out onto a lightly floured surface. Knead the dough for about six to eight minutes until it is smooth and elastic. This step develops the gluten needed for a good texture in the rolls.
Step 5. Place the dough in a lightly greased bowl, cover it with a kitchen towel, and let it rise in a warm area for 1 to 1.5 hours or until it has doubled in size. This rise is essential for achieving light and fluffy rolls.
Step 6. After the dough has risen, punch it down to release the air. Turn it out onto a floured surface again and roll it into a log shape. Cut the dough into equal pieces to form individual rolls.
Step 7. Shape each piece of dough into a ball and place them on a baking sheet lined with parchment paper. Cover with a towel and let them rise for another 30 to 45 minutes until puffy. This second rise helps ensure a light final product.
Step 8. While the rolls are rising, prepare the garlic butter by mixing melted butter, minced garlic, and chopped parsley in a small bowl. This mixture will be brushed on the rolls before baking, enhancing their flavor and aroma.
Step 9. Preheat your oven to 375°F. Once the rolls have risen, brush the tops with the beaten egg and sprinkle them with flaky sea salt. This gives the rolls a golden crust and a touch of extra flavor.
Step 10. Bake the rolls in the preheated oven for about 20-25 minutes, or until golden brown. Watch for them to be firm to the touch and a deep golden color, indicating they are ready to come out.
Step 11. When they are done, remove them from the oven and brush with the garlic butter mixture while still warm. This adds a flavorful finish to the rolls, making them even more inviting.
Step 12. Let the rolls cool slightly on the baking sheet before serving. This brief cooling period allows the flavors to settle. Serve warm and enjoy the comforting aroma and taste of your freshly made Garlic Bread Rolls.
Serving Suggestions
Garlic Bread Rolls are incredibly versatile and perfect for various occasions. Serve them as a delightful side to pasta dishes, soups, or salads. They also make for a tasty breakfast option, simply warmed with butter. If you have leftovers, they can be kept on the counter for a quick snack or toasted for a satisfying afternoon bite. Every way you enjoy them, these rolls are sure to complement your meals.
Pro Tips for Best Results
- Ensure your milk is warm, around 110°F. This temperature activates the yeast effectively, leading to a good rise.
- Don’t skip the second rise for the rolls after shaping. It’s important for achieving fluffiness.
- Keep an eye on the baking time. Every oven can vary, so check for a golden color for doneness.
- For best flavor, use fresh garlic and parsley directly in the butter mixture.
- When shaping the rolls, keep them uniform in size for even baking.
- If you’re in a cooler environment, let the dough rise in a slightly warm oven to create a better environment for the yeast.
Common Mistakes to Avoid
- Not Using Warm Milk: If the milk is too hot or too cold, it can kill the yeast or not activate it properly, leading to dense rolls. Always check the temperature before mixing.
- Forgetting to Knead Dough: Skipping the kneading step will result in cookies that are heavy and do not rise well. Kneading develops gluten, necessary for the structure of the rolls.
- Rushing the Rise: If the dough isn’t allowed to rise enough, the rolls will be flat and dense. Be patient and wait until the dough has visibly doubled in size.
- Overpacking the Baking Sheets: Placing too many rolls too close together can lead to uneven baking, as some may touch and not get enough heat. Give them ample space to rise and expand properly.
- Not Brushing with Egg Wash: Skipping the egg wash can result in pale rolls. The wash gives them a beautiful golden color and a nice crust.
- Ignoring the Garlic Butter: If you forget to add the garlic butter right after baking, the rolls may lack that rich, savory flavor. Make sure to brush them while they are warm for the best impact.
Variations & Substitutions
- Cheesy Garlic Rolls: Add shredded cheese inside each roll before baking for extra flavor.
- Herbs: Experiment with different herbs like rosemary or thyme for varied flavor profiles.
- Spicy Garlic Rolls: Add a pinch of red pepper flakes to the garlic butter for a spicy kick.
- Gluten-Free Version: Substitute all-purpose flour with a gluten-free blend for a gluten-free option.
Storage & Reheating
- Room Temperature Storage: Store leftover rolls in an airtight container at room temperature for up to 2 days.
- Refrigerator Storage: If you prefer, you may refrigerate them for up to 5 days. Just make sure they’re in an airtight container.
- Freezing: These rolls freeze well. Wrap them tightly in plastic wrap and place them in a freezer bag. They can be frozen for up to 3 months.
- Best Reheating Method: To reheat, place them in a preheated oven at 350°F for about 10 minutes, ensuring they stay warm and soft.
Nutrition Information
- Calories: 220
- Total Fat: 8g
- Saturated Fat: 5g
- Carbohydrates: 31g
- Fiber: 1g
- Sugar: 1g
- Protein: 5g
- Sodium: 180mg
Frequently Asked Questions
Can I make this recipe ahead of time?
Yes, you can prepare the dough and let it rise, then shape and refrigerate the rolls overnight before baking them the next day. This allows for more flavor development.
How long does it last in the fridge?
Garlic Bread Rolls last in the fridge for about 5 days when stored properly in an airtight container.
Can I freeze this recipe?
Absolutely! Freezing the rolls before or after baking works well. Just ensure they are wrapped tightly.
What can I substitute for one ingredient?
If you need a substitute for fresh garlic, you can use garlic powder, but fresh garlic offers a more vibrant flavor.
Why didn’t my recipe turn out as expected?
Issues like inactive yeast, not allowing enough rising time, or incorrect oven temperature can lead to disappointing results. Always check these components for success.
Final Thoughts
Making Garlic Bread Rolls brings together simple ingredients and straightforward techniques, resulting in a warm and comforting dish. The delightful aroma and satisfying taste share well with family and friends, turning any meal into something special. Embrace the process and enjoy the rewards of your hard work in the kitchen. Each roll is a little piece of happiness to complement your meals.
Garlic Bread Rolls
Ingredients
For the Dough
- 4.5 tablespoons unsalted butter adds moisture and richness
- 2 tablespoons minced garlic provides strong, savory flavor
- 3.5 cups + 1 tablespoon all-purpose flour gives structure and texture
- 3 tablespoons chopped fresh parsley adds fresh flavor and color
- 1 tablespoon granulated sugar helps with browning and flavor
- 2.25 teaspoons instant yeast aids in leavening the rolls
- 1 teaspoon fine sea salt enhances overall flavor
- 1 cup whole or 2% milk, warmed to 110°F provides moisture and helps activate yeast
- 1 large egg, room temperature binds ingredients
- 1 beaten egg for brushing the tops adds shine and color
For the Garlic Butter
- 2 tablespoons unsalted butter for richness
- 1 tablespoon minced garlic enhances flavor
- 1 tablespoon chopped fresh parsley adds a fresh touch
- to taste pinch flaky sea salt for finishing
Instructions
Preparation
- In a large bowl, combine the warm milk and granulated sugar, stir gently until dissolved, then add instant yeast and let sit for about five minutes until foamy.
- Add the room temperature egg, melted butter, and fine sea salt to the mixture, and stir until well combined.
- Gradually mix in the all-purpose flour, starting with a cup at a time, and stir until the dough begins to come together.
- Turn the dough out onto a lightly floured surface and knead for about six to eight minutes until smooth and elastic.
- Place the dough in a lightly greased bowl, cover with a kitchen towel, and let rise in a warm area for 1 to 1.5 hours or until doubled in size.
- After the dough has risen, punch it down to release air. Turn it out onto a floured surface and roll it into a log shape. Cut into equal pieces to form individual rolls.
- Shape each piece of dough into a ball and place them on a baking sheet lined with parchment paper. Cover with a towel and let rise for another 30 to 45 minutes until puffy.
Baking
- While the rolls are rising, prepare the garlic butter by mixing melted butter, minced garlic, and chopped parsley in a small bowl.
- Preheat your oven to 375°F. Brush the tops of the risen rolls with the beaten egg and sprinkle flaky sea salt on top.
- Bake the rolls in the preheated oven for about 20-25 minutes or until golden brown.
- Remove from the oven and brush with the garlic butter mixture while still warm.
- Let the rolls cool slightly on the baking sheet before serving.