caramelized onions recipe quick and easy
Why You’ll Love This caramelized onions recipe quick and easy
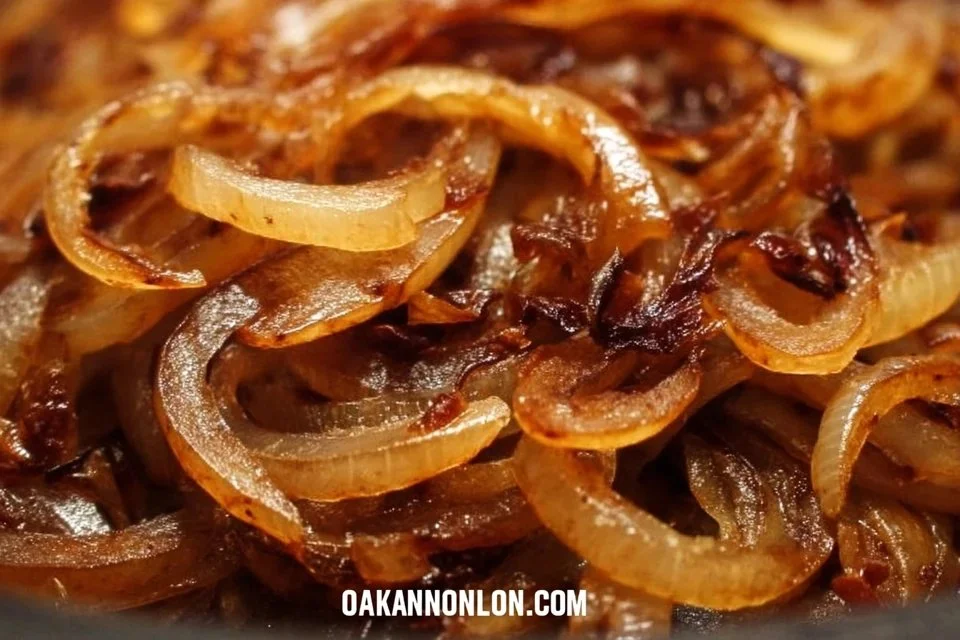
Caramelized onions are incredibly easy to make, delivering reliable results each time. Their comfort and balanced flavor enhance various meals, whether you’re using them for a quick weeknight dinner or a special occasion. This recipe for caramelized onions provides everyday value, allowing you to elevate your dishes with minimal effort.
Kitchen Tools You’ll Need
- A large skillet
- A wooden spoon or spatula
- A cutting board
- A sharp knife
Ingredients
- Onions (sweet and mild, for depth of flavor)
- Butter or Olive Oil (for moisture and richness)
- Salt (enhances natural onion flavors)
- Sugar (optional, for additional sweetness)
- Balsamic Vinegar (optional, for acidity and complexity)
How to Make caramelized onions recipe quick and easy
Step 1. Begin by preparing the onions, peeling away the skin and slicing them into even strips. A uniform thickness ensures they cook at the same rate, resulting in evenly caramelized onions. Aim for about ¼-inch slices to balance cooking time with flavor release. Once sliced, set them aside for the cooking process and make sure they’re ready to go before you heat any oil or butter.
Step 2. In a large skillet, heat a couple of tablespoons of butter or olive oil over medium heat. The fat will serve as a cooking medium, helping the onions to soften and become tender as they cook. Once the fat is warm but not smoking, you can begin to add the sliced onions. Watch for the fat to shimmer slightly, which indicates that it’s ready for the onions.
Step 3. Add the sliced onions to the skillet, stirring to coat them in the butter or oil evenly. This initial stir will help distribute the fat, allowing for even cooking. As they start to cook, you may want to sprinkle in a bit of salt, as this helps to draw out moisture from the onions. This step is crucial for creating a good foundation of flavor.
Step 4. After the onions are stirred in and seasoned, reduce the heat to medium-low. This lower temperature is essential, as caramelization requires a slower, gentler cooking process. Stir occasionally to prevent sticking and burning—keeping a close eye on the onions ensures they become beautifully golden without getting too dark or crispy. Aim for a soft texture as they begin to transform.
Step 5. After about 15 to 20 minutes of cooking, you can add a pinch of sugar if you want to enhance their sweetness. The optional sugar will help to caramelize the onions faster, adding to their natural sugars. Make sure to mix it in thoroughly so that all the onions benefit from the additional sweetness. Continue to cook, observing the color shift to a deeper brown as they develop their sweet and savory flavor.
Step 6. As the onions continue to cook, you may want to add balsamic vinegar during the final moments for an extra layer of flavor. Drizzle it in and give the onions a good stir, allowing the vinegar to incorporate fully. This step adds acidity that balances the sweetness of the caramelized onions, enhancing their overall taste. Cook for another few minutes until the vinegar is mostly evaporated and the onions are deeply caramelized.
Step 7. Once the onions reach a rich, dark brown color and a jam-like consistency, they are ready to remove from the heat. Be sure to taste them to check for seasoning; you may want to adjust with a pinch of salt. Remove the skillet from the burner and let the onions cool slightly before transferring them to a serving dish or storage container.
Serving Suggestions
Caramelized onions can be used in countless ways. They make a delicious topping for burgers or steak, adding a sweet and savory element to your proteins. You can mix them into pasta dishes for added richness or use them in a quiche for a comforting breakfast. They also work beautifully in dips or spreads, perfect for snacks with bread or crackers. If you have leftovers, they can easily transform a simple meal into something special.
Pro Tips for Best Results
- Stir occasionally to prevent burning.
- Cook at medium-low heat for best flavor development.
- Patience is key; let the onions gradually caramelize.
- Add a splash of water if they stick to the skillet.
- Adjust seasoning as needed after cooking.
- Use a heavy-bottomed skillet for even cooking.
Common Mistakes to Avoid
Using high heat. Cooking onions at too high a temperature can cause them to burn instead of caramelizing. The sugars can quickly char rather than gently brown, preventing the sweet flavors from developing. Always stick to medium-low heat for caramelization.
Not stirring enough. If you leave the onions unattended, they can stick or burn. Stirring occasionally ensures they cook evenly and develop the right texture and flavor. Make it a habit to check in on them periodically.
Adding too much sugar. While sugar can enhance sweetness, too much can lead to cloying caramelized onions. Stick to a small pinch to allow the natural sugars to shine through. Taste testing is key for balance.
Overcooking or undercooking. Caramelized onions require patience to achieve the right color and flavor. They should be golden brown and soft, not crispy or raw. Keep an eye on them to ensure they reach the perfect consistency.
Skipping the salt. Salt is essential for flavor; it helps the onions to release moisture and enhances their natural sweetness. Skipping it can lead to bland results. Be sure to add salt at the beginning of cooking.
Ignoring the taste test. Underestimating the importance of tasting can lead to a bland dish. Always taste your caramelized onions at the end to adjust seasoning if needed. A small tweak can make a big difference in flavor.
Variations & Substitutions
For a twist, consider adding herbs like thyme or rosemary during the cooking process to infuse an aromatic element. You can also experiment with a dash of red wine or other flavored vinegars besides balsamic for added depth. For a spicier kick, a sprinkle of red pepper flakes pairs wonderfully with the sweetness of the onions.
Storage & Reheating
To store caramelized onions, allow them to cool to room temperature before transferring them to an airtight container. They can sit out for up to two hours at room temperature and should then be refrigerated. In the fridge, they will keep well for about a week. For longer storage, caramelized onions can also be frozen in portions for up to three months. To reheat, warm them gently in a skillet over low heat, adding a splash of water or oil to maintain their texture.
Nutrition Information
Nutrition values are estimates and may vary based on ingredients used.
Frequently Asked Questions
Can I make this recipe ahead of time?
Yes, caramelized onions can be made ahead of time and stored in the fridge for about a week. They also freeze well if you want to extend their life for use in future dishes.
How long does it last in the fridge?
When stored in an airtight container, caramelized onions will last for approximately one week in the refrigerator. Be sure to label the container with the date for best results.
Can I freeze this recipe?
Absolutely! Caramelized onions freeze very well. Portion them into freezer-safe bags or containers, and they will keep for up to three months. Just thaw and reheat them when you’re ready to use.
What can I substitute for one ingredient?
If you’re out of butter, olive oil works equally well for cooking the onions. If you only have one onion, you can still follow the recipe for a smaller batch. Just adjust cooking times slightly based on quantity.
Why didn’t my recipe turn out as expected?
Common issues include cooking at too high a heat, which can lead to burning rather than caramelizing, or not stirring enough. Make sure to monitor closely and adjust your heat as necessary to achieve that perfect golden brown color.
Final Thoughts
Making caramelized onions is a rewarding experience that adds a wonderful depth to many meals. Their sweet, complex flavor enhances everything from simple breakfasts to elaborate dinners. Enjoy creating this delightful ingredient at home, knowing that the slow cooking process is worth every minute. With a bit of patience and care, you’ll elevate your dishes and find comfort in the rich flavor of caramelized onions.

Caramelized Onions
Ingredients
Main Ingredients
- 4 medium sweet onions Sliced into ¼-inch strips
- 2 tablespoons butter or olive oil For moisture and richness
- 1 teaspoon salt Enhances natural onion flavors
- 1 pinch sugar Optional, for additional sweetness
- 1 tablespoon balsamic vinegar Optional, for acidity and complexity
Instructions
Preparation
- Peel and slice the onions into even strips, about ¼-inch thick.
Cooking
- In a large skillet, heat butter or olive oil over medium heat.
- Add the sliced onions to the skillet, stirring to coat them in the fat.
- Sprinkle a bit of salt over the onions to help draw out moisture.
- Reduce the heat to medium-low and stir occasionally, ensuring they cook evenly.
- After 15-20 minutes, add a pinch of sugar if desired and continue cooking.
- Optionally, add balsamic vinegar during the final moments and stir.
- Once deeply caramelized and jam-like, remove from heat and adjust seasoning.