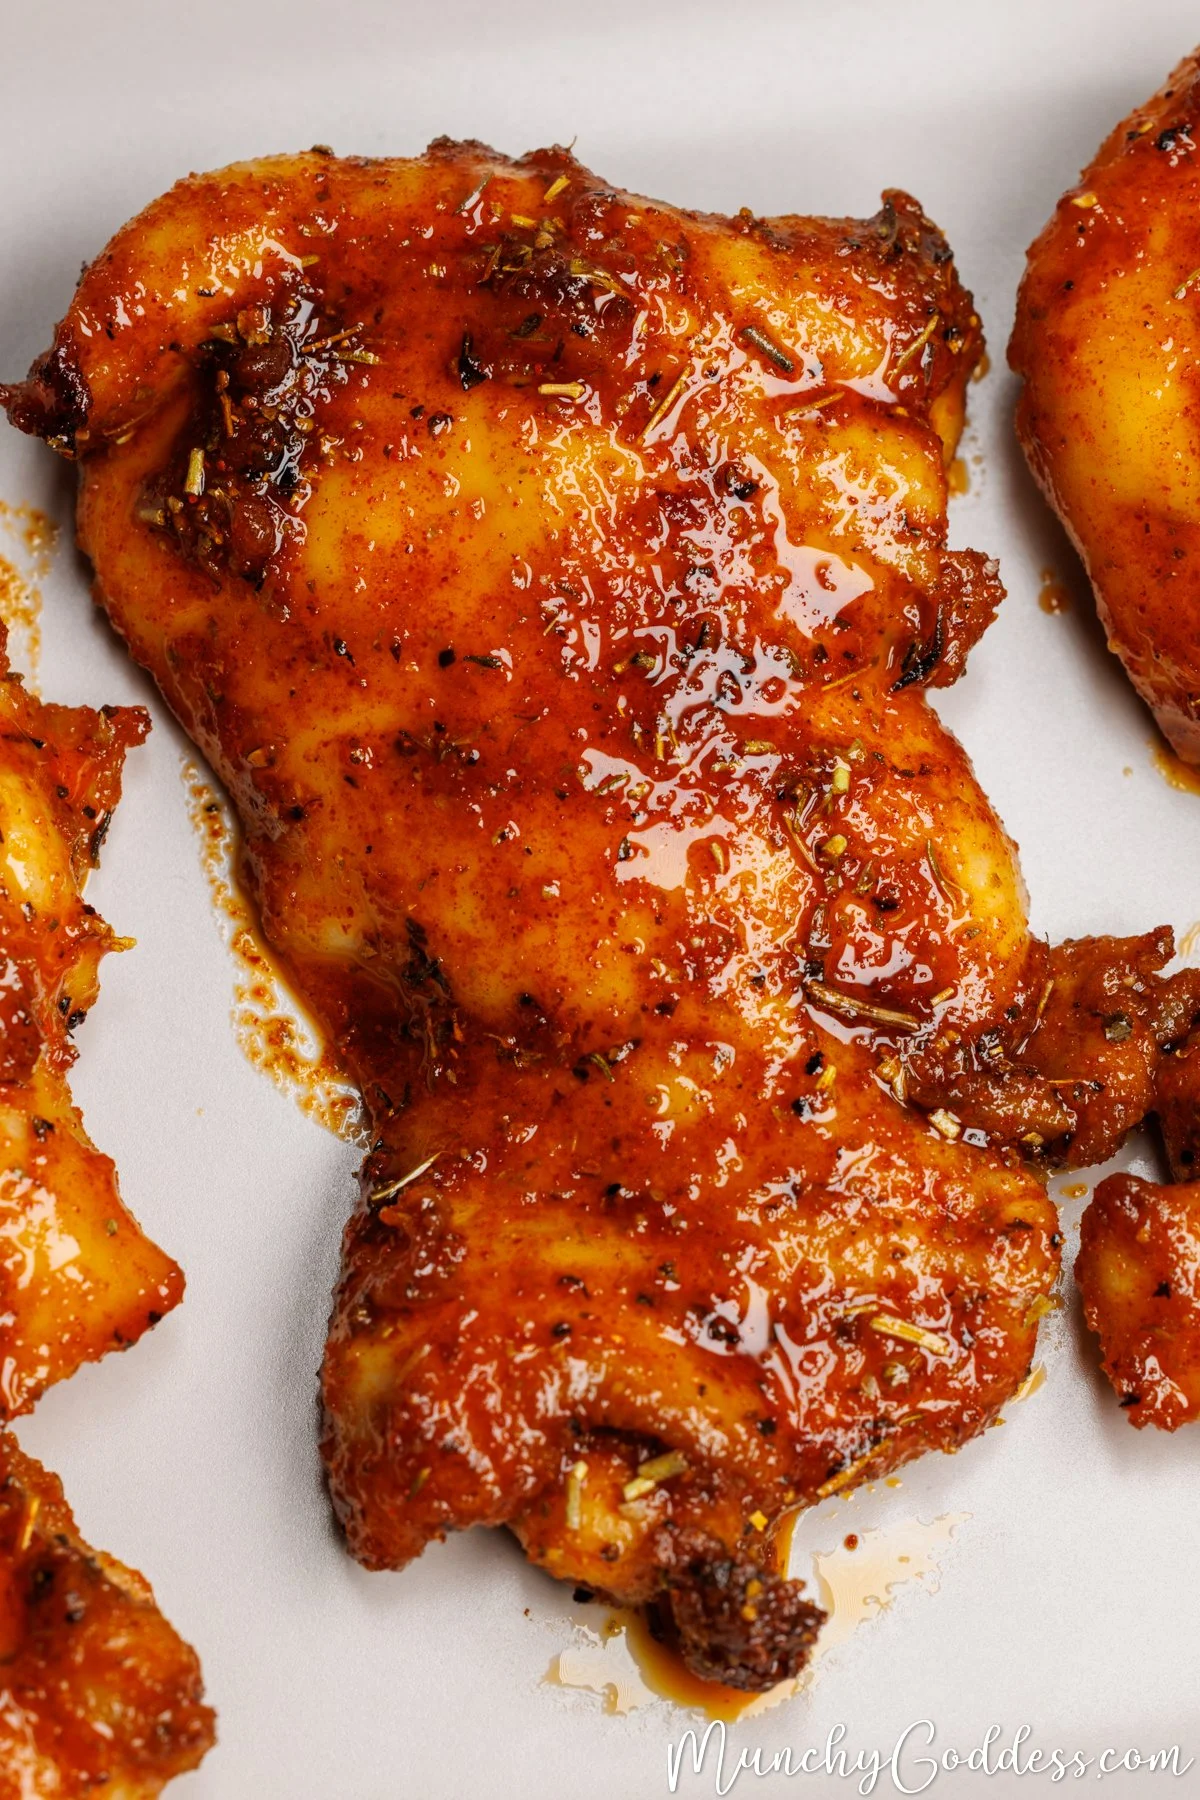
Sweet & Sticky BBQ Boneless Chicken Thighs Baked in the Oven
There’s something wonderfully comforting about preparing a dinner that feels special without being complicated. A reliable recipe can transform a weeknight into a little something more, or make a weekend gathering easier. This dish is perfect for those moments when you want to savor good food amongst friends or family without the stress. The simplicity of these Sweet & Sticky BBQ Boneless Chicken Thighs makes them a go-to choice for any occasion. Let’s step into the kitchen together and create something delicious.
Why You’ll Love This Recipe {focus_keyword}
These Sweet & Sticky BBQ Boneless Chicken Thighs are uncomplicated yet satisfying, offering both ease and reliability in preparation. Their balance of flavors ensures a comforting meal that can be enjoyed any night of the week. The combination of seasonings contributes not only to the dish’s taste but also enhances the natural flavor of the chicken, making everyday cooking feel special.
Kitchen Tools You’ll Need
- Baking sheet
- Mixing bowl
- Measuring spoons
- Tongs or fork
Ingredients
- 2.5 tablespoons olive oil (adds moisture)
- ½ teaspoon salt (or salt to taste) (enhances flavor)
- ¼ teaspoon ground black pepper (provides warmth)
- 1 teaspoon onion powder (adds savory depth)
- 1 teaspoon garlic powder (accentuates flavor)
- 1 teaspoon smoked paprika (introduces smokiness)
- 1 teaspoon brown sugar (contributes sweetness)
- ½ teaspoon Italian seasoning (adds herbal notes)
- 1.5 pounds boneless skinless chicken thighs (serves as the main protein)
How to Make {focus_keyword}
Step 1. Begin by preheating your oven. This step is crucial as it ensures that your chicken thighs will cook evenly from the moment they go in. A properly preheated oven will help seal in moisture and flavor, giving you juicy thighs.
Step 2. In a mixing bowl, combine the olive oil, salt, black pepper, onion powder, garlic powder, smoked paprika, brown sugar, and Italian seasoning. Stir these ingredients together until they create a cohesive mixture. The oil will help the seasoning adhere to the chicken, while the spices add flavor and depth.
Step 3. Once your seasoning mix is ready, take the boneless skinless chicken thighs and place them in the bowl. Ensure each piece is well coated with the marinade. You can use your hands or tongs for this, taking care to fully cover each thigh for optimal flavor enhancement as they bake.
Step 4. Arrange the coated chicken thighs in a single layer on a baking sheet. Spacing them out helps achieve an even cooking process. When they’re laid out nicely, it’s easier for the heat to circulate around each piece, leading to better texture and doneness.
Step 5. Carefully place the baking sheet into the preheated oven. Make sure to monitor the chicken as it cooks. The thighs should change color and firm up slightly as they bake.
Step 6. After a while, check the chicken for doneness. The thighs will begin to develop a nice golden color and will feel firm to the touch. This stage indicates that they are approaching perfect tenderness and flavor.
Step 7. Once the chicken is fully cooked through, remove the baking sheet from the oven. This is the moment you’ve been waiting for, when all the flavors combine beautifully. Allow the chicken to rest for a few minutes to let the juices redistribute, ensuring every bite remains tender.
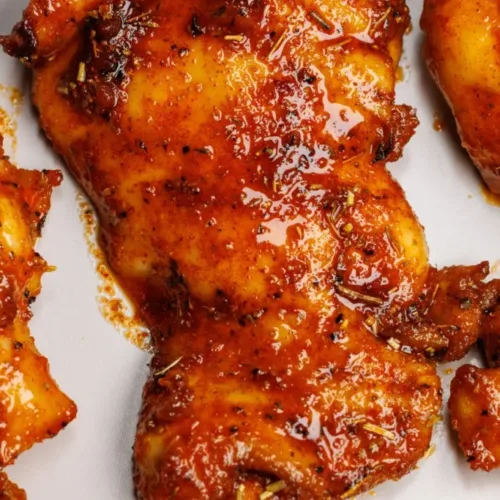
Step 8. Slice or serve the chicken thighs as preferred. Enjoy the sweet and sticky glaze that has developed during baking, making this dish not only tasty but also visually appealing.
Serving Suggestions
These Sweet & Sticky BBQ Boneless Chicken Thighs can fit into various meal contexts. Serve them alongside a fresh salad for a light dinner or place them on a bun for a satisfying sandwich. They also make great snacks during the day, whether enjoyed with a side of vegetables or as part of a picnic spread. Any leftovers can be incorporated into salads, wraps, or grain bowls, making them perfect for meal prep or a busy week ahead.
Pro Tips for Best Results
- Make sure your chicken thighs are at room temperature before cooking to help them cook evenly.
- Don’t skip the resting step after cooking; this allows for juicier chicken.
- Use a meat thermometer to ensure the chicken reaches an internal temperature of 165°F for safety.
- Experiment with the seasoning mix based on your taste preferences.
- Pair the chicken with sides that complement its flavor, such as coleslaw or cornbread.
- Monitor the cooking time closely to avoid dry chicken.
Common Mistakes to Avoid
-
Not Preheating the Oven: Skipping this step can lead to unevenly cooked chicken, resulting in dryness. Always preheat your oven to ensure proper cooking conditions.
-
Overcooking the Chicken: Cooking the chicken for too long can lead to toughness. Keep an eye on the color and firmness to know when it’s done.
-
Insufficient Seasoning: Under-seasoning can result in bland chicken. Make sure to thoroughly coat the chicken in the seasoning mixture for maximum flavor.
-
Ignoring Rest Time: Cutting into the chicken right after it comes out can cause juices to run out, making it dry. Always let it rest for a few minutes before serving.
-
Baking in a Crowded Pan: Placing too many chicken thighs on the baking sheet can trap moisture and cause steaming rather than roasting. Space them out for even cooking.
-
Not Using a Meat Thermometer: Without checking the internal temperature, it’s easy to undercook or overcook the chicken. Using a thermometer helps ensure safety and optimal texture.
Variations & Substitutions
Consider changing the spice blend to fit different flavor profiles, such as adding a hint of cayenne for heat or adjusting the sweetener for a bolder flavor. You could also try marinating the chicken in the seasoning overnight for deeper flavor penetration. If you enjoy a tangy touch, a splash of vinegar could be added to the marinade, though this wasn’t part of the original recipe.
Storage & Reheating
Store any cooked chicken thighs in an airtight container in the refrigerator for up to four days. For longer storage, consider freezing them; ensure they are well-wrapped to prevent freezer burn. When ready to enjoy again, reheat in the oven at a low temperature to preserve their texture, ensuring they reach an internal temperature of 165°F.
Nutrition Information
Nutrition values per serving:
- Calories: Not available
- Total Fat: Not available
- Saturated Fat: Not available
- Carbohydrates: Not available
- Fiber: Not available
- Sugar: Not available
- Protein: Not available
- Sodium: Not available
Frequently Asked Questions
Can I make this recipe ahead of time?
Yes, you can marinate the chicken thighs ahead of time. Allow them to sit covered in the refrigerator for a few hours or overnight, then bake them when ready to serve.
How long does it last in the fridge?
Cooked chicken thighs can last in the fridge for about four days when stored properly in an airtight container.
Can I freeze this recipe?
Absolutely! You can freeze the cooked chicken. Just ensure they are well-wrapped to avoid freezer burn, and they will keep well for up to three months.
What can I substitute for one ingredient?
You can swap out the Italian seasoning with other dried herbs like thyme or oregano for a different flavor profile.
Why didn’t my recipe turn out as expected?
Common issues could arise from incorrect cooking times or temperatures. Always monitor the chicken closely, and ensure your oven is preheated to avoid undercooking or overcooking.
Final Thoughts
Making these Sweet & Sticky BBQ Boneless Chicken Thighs will likely become a comforting routine. Each step flows naturally, leading to a rewarding dish that brings pleasure to both the cook and the diners. As you gather around the table, savor the simple yet satisfying flavors together. Cooking like this can remind us of the joy in everyday meals, creating moments of connection and enjoyment.
Sweet & Sticky BBQ Boneless Chicken Thighs
Ingredients
For the marinade
- 2.5 tablespoons olive oil adds moisture
- ½ teaspoon salt enhances flavor (or salt to taste)
- ¼ teaspoon ground black pepper provides warmth
- 1 teaspoon onion powder adds savory depth
- 1 teaspoon garlic powder accentuates flavor
- 1 teaspoon smoked paprika introduces smokiness
- 1 teaspoon brown sugar contributes sweetness
- ½ teaspoon Italian seasoning adds herbal notes
Main ingredient
- 1.5 pounds boneless skinless chicken thighs serves as the main protein
Instructions
Preparation
- Preheat your oven.
- In a mixing bowl, combine the olive oil, salt, black pepper, onion powder, garlic powder, smoked paprika, brown sugar, and Italian seasoning. Stir until cohesive.
- Coat the boneless chicken thighs in the seasoning mix thoroughly using your hands or tongs.
- Arrange the coated chicken thighs in a single layer on a baking sheet.
Cooking
- Bake the chicken thighs in the preheated oven, monitoring them as they cook.
- Check for doneness; the chicken should be golden and firm to the touch.
- Once fully cooked, remove the baking sheet from the oven and let the chicken rest for a few minutes before slicing or serving.