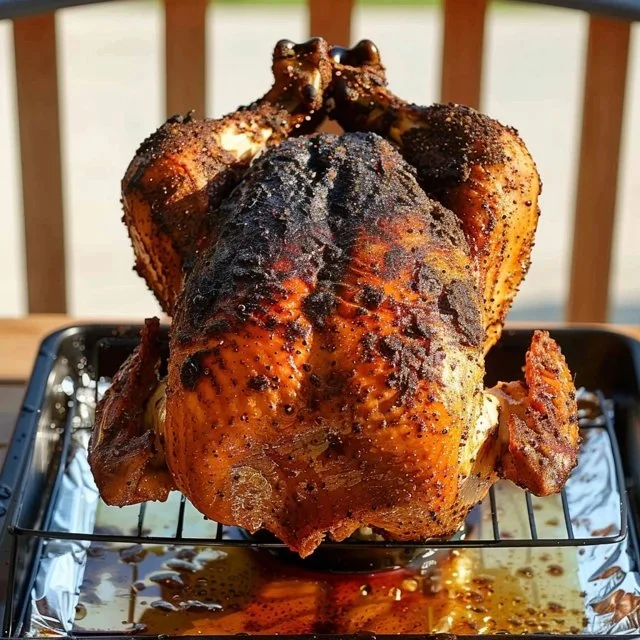
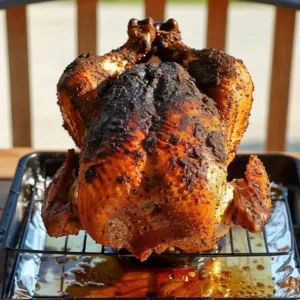
There’s something comforting about a dish that feels both rustic and satisfying. It’s a fantastic option for a weeknight dinner or a leisurely weekend gathering with friends. Beer can chicken combines simplicity with flavor, making it a reliable choice when you want something delicious without a lot of fuss. The chicken emerges juicy and tender, infused with the subtle notes from the beer and spices. Let’s delve into the steps to create this flavorful dish.
Why You’ll Love This Beer Can Chicken in oven recipe
This recipe is all about ease and reliability, transforming a whole chicken into a flavorful centerpiece. The balance of spices contributes to a comforting flavor profile that’s perfect for any occasion. Whether you’re cooking for family or hosting friends, Beer Can Chicken serves as a practical option that brings warmth to your table without demanding too much time or effort.
Kitchen Tools You’ll Need
- Grill or oven
- Roasting pan
- Meat thermometer
- Basting brush
Ingredients
- 1 can beer, half-full, room temperature (adds moisture and flavor)
- 5 pound whole chicken, neck and giblets removed (provides rich, tender meat)
- 2 tablespoons vegetable oil (helps spices adhere and promotes browning)
- 1 teaspoon cumin (adds earthy warmth)
- 2 teaspoons garlic powder (enhances savory flavor)
- 2 teaspoons onion powder (provides depth of flavor)
- 2 teaspoons kosher salt (balances flavors and aids in moisture retention)
- 1 teaspoon paprika (introduces mild sweetness and color)
- 1 teaspoon oregano (adds a hint of earthiness)
- 1 teaspoon cayenne pepper (provides heat)
- ½ teaspoon ground black pepper (enhances overall seasoning)

How to Make Beer Can Chicken
Step 1. Begin by preparing your grilling or roasting space. If using a grill, make sure it’s set up for indirect heat. For an oven, simply preheat it as needed. The cooking method contributes to even heat distribution, ensuring a well-cooked chicken.
Step 2. Take the room-temperature beer can and pour out half of the beer. This will help prevent any spills while cooking. The remaining beer will infuse moisture into the chicken as it cooks, enhancing flavor and tenderness.
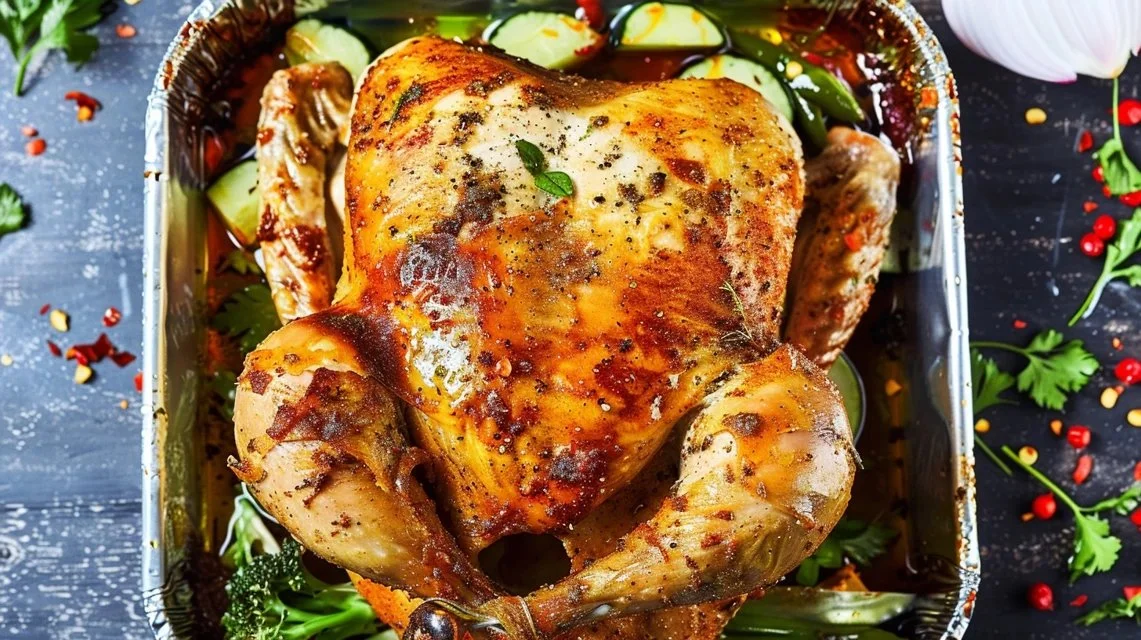
Step 3. Prepare the chicken by patting it dry with paper towels. This helps the skin crisp up during cooking. Removing excess moisture is key to achieving that desired crispy texture, making every bite more enjoyable.
Step 4. Rub the vegetable oil all over the chicken’s surface. This helps the spice blend stick and provides a beautiful golden color as it roasts. Make sure to cover all areas to ensure even seasoning and browning.
Step 5. In a small bowl, mix together the cumin, garlic powder, onion powder, kosher salt, paprika, oregano, cayenne pepper, and black pepper. This spice blend creates a balanced flavor that complements the beer and chicken beautifully.
Step 6. Generously sprinkle the spice mixture all over the chicken. Make sure to coat the cavity and under the skin if possible. This allows for a deeper flavor infusion, making each bite delicious and satisfying.
Step 7. Carefully place the chicken upright onto the beer can. The can should fit snugly into the cavity of the chicken, providing stability. This unique position helps cook the chicken evenly while allowing steam from the beer to circulate, keeping the meat moist.
Step 8. Position the chicken on the grill or in the oven, standing upright. Avoid direct heat to ensure the chicken cooks evenly without burning the skin. The indirect cooking method allows the chicken to roast gently while absorbing the flavors from the beer.
Step 9. Once cooking, use a meat thermometer to check for doneness. The internal temperature should reach 165°F in the thickest parts. This ensures the chicken is thoroughly cooked while maintaining its juiciness. Keep an eye on the skin for a golden appearance, which indicates it’s done.
Step 10. When the chicken is finished, let it rest for a few minutes before serving. Resting allows the juices to redistribute throughout the meat, ensuring a moist and tender chicken. This step is crucial for maximizing flavor.
Serving Suggestions
Beer can chicken makes a wonderful centerpiece for family meals, but it also serves well as leftovers for breakfast or snacks. Consider shredding some meat and using it in sandwiches or tacos for a quick lunch option. As an easy dinner, pair it with roasted vegetables or a fresh salad, creating a comforting meal that appeals to all. The versatility of the chicken means it can easily be repurposed in various dishes, making it a practical choice for busy weeks.
Pro Tips for Best Results
- Use a room temperature chicken: It cooks more evenly than a cold bird, ensuring nice texture throughout.
- Baste during cooking: If desired, basting with drippings can enhance flavor and moisture, helping the skin to brown.
- Let it rest: Allowing the chicken to sit for a few minutes after cooking helps keep it juicy.
- Monitor the heat: Keeping an eye on grill temperatures prevents charring and promotes thorough cooking.
- Experiment with spices: Feel free to adjust the spice mix to match your tastes; garlic and onion will always shine here.
- Caution with beer choice: Select a beer you enjoy drinking, as its flavor will infuse into the chicken.
Common Mistakes to Avoid
- Skipping the beer can: Not using a can can lead to uneven cooking. The can helps maintain moisture and adds flavor throughout.
- Not drying the chicken: Failure to pat dry can result in a soggy skin that won’t crisp up. This step is essential for that appealing crunch.
- Overcooking: It’s easy to miss doneness and dry out the chicken. Always check with a thermometer for accurate temperature.
- Using too many spices: While flavor is important, overdoing it can overwhelm the dish. Aim for balance to complement the chicken.
- Not allowing it to rest: Cutting too soon can lead to loss of juices, making the meat dry. Patience is key here for best texture.
- Incorrect can placement: If the chicken isn’t stable on the can, it can tip over, leading to uneven cooking. Ensure it’s properly seated before roasting.
Variations & Substitutions
For a different flavor profile, consider adjusting the spice blend; adding herbs like thyme or rosemary will bring a new dimension. You could also try using different types of beer; a stout can add a deeper flavor, while a lager might lend a lighter touch. Cooking methods can vary as well; you can consider roasting in an oven or even a slow cooker for a different finish.
Storage & Reheating
Store any leftover chicken at room temperature for no more than two hours after cooking. For longer storage, transfer the chicken to an airtight container and refrigerate for up to four days. Alternatively, if planning to keep it longer, consider freezing. Make sure to wrap it securely to avoid freezer burn. When reheating, the best method is to use an oven or toaster oven to maintain skin crispness; a microwave may make the skin chewy.
Frequently Asked Questions
Can I make this recipe ahead of time?
While it’s best enjoyed fresh, you can prepare the spice rub in advance. The chicken can be seasoned and left to marinate briefly in the fridge before cooking.
How long does it last in the fridge?
Cooked beer can chicken will typically last about four days when stored in an airtight container in the refrigerator.
Can I freeze this recipe?
Yes, you can freeze cooked chicken. Ensure it’s wrapped well to maintain quality and label it with the date for easy tracking.
What can I substitute for one ingredient?
You could adjust the spices based on what you have. If you don’t have cumin, you might consider a mix of coriander and chili powder to keep a similar flavor dynamic.
Why didn’t my recipe turn out as expected?
Common issues involve inadequate seasoning or cooking at the wrong temperature. Following the steps carefully and monitoring internal temperature can help avoid these pitfalls.
Final Thoughts
Making Beer Can Chicken combines straightforward steps with delightful flavor, resulting in a dish that’s enjoyable for any occasion. The simplicity of the process allows for an accessible and comforting meal that brings satisfaction to the table. Enjoy the ease of this recipe, knowing you’ve created something both hearty and flavorful for your loved ones.
Beer Can Chicken
Ingredients
Main Ingredients
- 1 can beer, half-full, room temperature Adds moisture and flavor
- 5 pounds whole chicken, neck and giblets removed Provides rich, tender meat
- 2 tablespoons vegetable oil Helps spices adhere and promotes browning
Spice Blend
- 1 teaspoon cumin Adds earthy warmth
- 2 teaspoons garlic powder Enhances savory flavor
- 2 teaspoons onion powder Provides depth of flavor
- 2 teaspoons kosher salt Balances flavors and aids in moisture retention
- 1 teaspoon paprika Introduces mild sweetness and color
- 1 teaspoon oregano Adds a hint of earthiness
- 1 teaspoon cayenne pepper Provides heat
- ½ teaspoon ground black pepper Enhances overall seasoning
Instructions
Preparation
- Prepare your grilling or roasting space. If using a grill, set it up for indirect heat. For an oven, preheat as needed.
- Take the room-temperature beer can and pour out half of the beer to prevent spills while cooking.
- Pat the chicken dry with paper towels to help crisp the skin.
- Rub vegetable oil all over the chicken's surface.
- Mix together the spices: cumin, garlic powder, onion powder, kosher salt, paprika, oregano, cayenne pepper, and black pepper.
- Generously sprinkle the spice mixture all over the chicken, coating the cavity and under the skin where possible.
Cooking
- Carefully place the chicken upright onto the beer can, ensuring it fits snugly.
- Position the chicken on the grill or in the oven standing upright, avoiding direct heat.
- Use a meat thermometer to check for doneness; the internal temperature should reach 165°F.
- Let the chicken rest for a few minutes before serving.