
Italian Zucchini Recipes driving you nuts with all the drool-worthy photos on your feed? Been there. You spot someone’s gorgeous baked zucchini and start thinking, Why doesn’t mine turn out that golden, cheesy, and perfect? Well, same here. Before I figured out what I was doing, my zucchini dish used to come out, uh, not as Instagrammable as I wanted. But stick around. Because making a delicious baked zucchini with an Italian twist isn’t as complicated as you might think. I’m about to spill what actually works, the good stuff.
How to Make Baked Zucchini
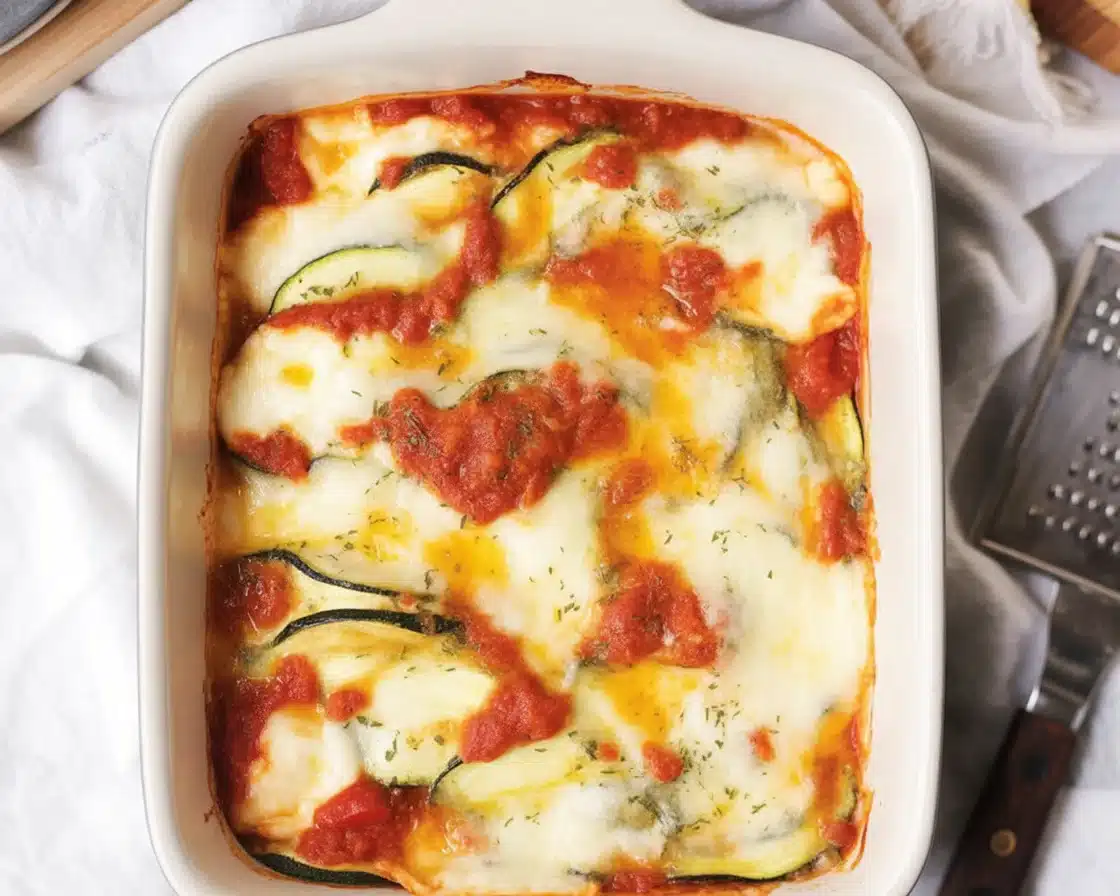
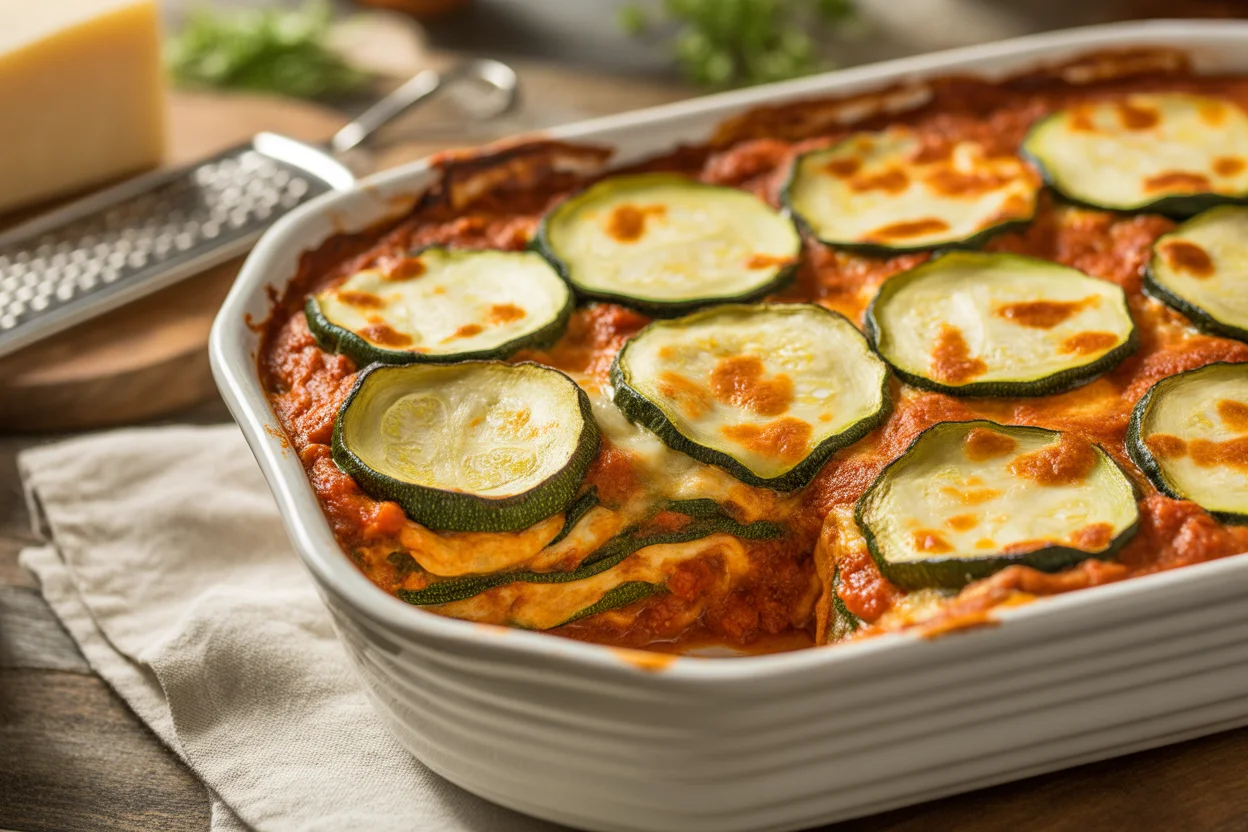
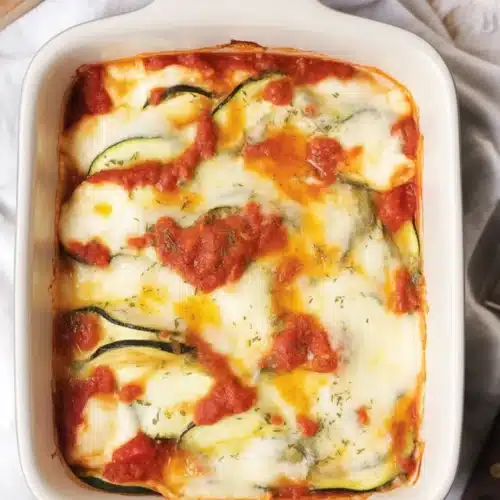
So, baked zucchini—especially those sung about in dreamy Italian Zucchini Recipes—comes down to a few simple steps and a teensy bit of patience. Start by slicing your zucchini, not too thin or you’ll have mush, too thick and they never cook. Medium rounds are great. Toss them in olive oil (use the real stuff, if you can splurge) along with a generous pinch of salt and pepper. Keeping it real, a bit more oil than you think you need helps here.
Next, lay your slices flat in a baking dish. Sprinkle over a mix of breadcrumbs, grated parmesan, and loads of Italian seasoning. Optional, but garlic powder is a power move. Bake at around 400°F (if your oven runs hot, maybe dial it down a little). You want bubbly cheese and slightly crisped edges, usually around 25 minutes does the trick.
Timing here can be weird—sometimes it takes five minutes less, sometimes more. Every oven’s got its own mood, ya know? The trick is to actually peek in and trust your eyes. When it looks golden and smells amazing, it’s probably ready.
Recipe Ingredients
This isn’t one of those ten-million-ingredient monstrosities. Thank goodness. For my go-to baked zucchini, you’ll want:
- 3-4 zucchinis (medium-size, not monster ones)
- 2 tablespoons olive oil
- Salt and black pepper, just eyeball it
- 1 cup Italian breadcrumbs
- ½ cup shredded parmesan cheese
- 1 teaspoon Italian seasoning
- Optional: garlic powder, red pepper flakes for a kick
That’s literally it. Some folks fancy a bit of mozzarella or a squeeze of lemon afterward. But honestly, this lineup covers the classics.
Tips for Cooking Zucchini
This part totally changed how my Italian Zucchini Recipes turned out. First, zucchini LOVES to turn soggy if you’re not careful. If your rounds look watery, lay them on a towel and sprinkle a bit of salt first. Let them chill out for ten minutes, dab the water off (works like magic, I swear). Don’t overdo the oil—too much and you’re in slippery territory.
And, oh, don’t crowd your baking dish! Give the slices some elbow room so the tops get those crispy bits. You want the oven air to circulate. Also, parmesan gets way toastier if you sprinkle it last, right before popping in the oven.
You really don’t need to get fancy here. High heat, a little patience, and resisting the urge to poke at them every five minutes is key. Trust the process.
“I tried this recipe for Sunday dinner. My super-picky kids ate it without complaining—then they actually asked for seconds. Never thought I’d see the day.” — Emily R., actual person, not a bot
Variations of the Dish
Alright, so you want to jazz it up? I’ve tried a few things that surprised me. Sometimes I swap the Italian breadcrumbs for panko if I want crazy crunch. Other times, I layer on thinly sliced tomatoes between the zucchini for extra juiciness. Or, if you’re feeling wild, you can even add some ricotta spooned over the top before baking. Makes it unexpectedly creamy and kinda fancy.
Switch out the seasonings if you like heat—cajun spices work. Want more herbs? Fresh basil at the end is next-level. Every family has their own spin on Italian Zucchini Recipes, so don’t sweat it if you go off-script. Oh, and you can even grill instead of bake for a little char flavor. It’s not set in stone.
| Tip Description | |
| Salting Zucchini | To prevent sogginess, salt zucchini slices and let them rest before baking. |
| Spacing on Baking Dish | Arrange slices with space to allow even cooking and crispiness. |
| Baking Temperature | Bake at 400°F but check as oven temperatures can vary; look for golden edges. |
| Storage Tips | Store leftovers in an airtight container for up to 3 days. |
| Reheating Methods | Use the oven to re-crisp leftovers; microwaving can lead to sogginess. |
Storage & Reheating Instructions
Let’s keep it real: leftovers always taste a little different, right? For storing, pop your baked zucchini in an airtight container, stick it in the fridge, and it’ll be fine for about three days. If it sits longer, it gets kind of wilted. You might need to eat it for lunch the next day, not the worst problem.
Reheating’s simple—you can zap it in the microwave, but if you want the top to crisp back up, use your oven or toaster oven for five-ish minutes at 375°F. Sometimes I even eat it cold, like a weirdo snack. Try it before you judge.
- Want to meal-prep? This dish reheats surprisingly well—just keep the topping separate if you plan to reheat in a pan.
- Serve leftovers as a side for eggs in the morning, kinda like a zucchini breakfast hash.
- Or just sneak some cold slices from the fridge. Guilty pleasure.
Common Questions
Can I make this without cheese?
Absolutely. Just skip the cheese, maybe throw on some nutritional yeast if that’s your jam. Not quite the same but still tasty.
Do I peel the zucchini?
Nope, skin stays on. It adds color, fiber, and, honestly, it’s less work.
Is this recipe gluten-free?
Only if you use gluten-free breadcrumbs, so double-check labels.
My zucchini turned mushy. Help?
Try salting the slices before baking to pull out extra water. And don’t pile them on top of each other in the dish.
What else can I serve with this?
Goes great with simple pasta, grilled chicken, or even inside a sandwich (trust me!).
Why You’ll Be Obsessed with this Recipe
There you go—the secrets to Italian Zucchini Recipes that actually taste like you raided a five-star restaurant’s kitchen. It’s easy, quick, and forgiving, so your odds are good for success (finally). Don’t let the simplicity fool you—this dish brings big flavor, every time. For more cozy dinner ideas, check out this resource on classic Italian favorites. Let me know if you make these and if you actually manage to save any leftovers. Honestly, good luck with that!
How to Make Fresh Pasta
Equipment
- Mixing Bowl
- Rolling Pin or Pasta Machine
- Knife or Pizza Cutter
Ingredients
Basic Fresh Pasta Dough
- 2 cups all-purpose flour or ’00’ flour for smoother texture
- 3 large eggs
- 1 tbsp olive oil optional, for elasticity and flavor
- salt optional, a pinch for taste
Instructions
- On a clean surface or in a bowl, make a mound with the flour and create a well in the center. Crack in the eggs.
- Use a fork to gently mix the eggs, slowly incorporating the flour from the edges.
- Knead the dough for 8–10 minutes until smooth and elastic. If sticky, dust with flour.
- Wrap the dough in plastic wrap and let it rest for 30 minutes at room temperature.
- Roll out dough using a pasta machine or rolling pin to desired thinness. Cut into your preferred shape (fettuccine, tagliatelle, squares).
- Boil in salted water for 2–3 minutes or until tender. Toss with sauce and serve immediately.