
Brown Sugar Pop Tart Cookies Hi, I’m Anjalina, a 28-year-old from the UK who never imagined that the kitchen would become my favourite place to laugh, experiment, and sometimes make a little mess. Today, I finally tried a recipe I’d pinned ages ago on Pinterest for these Brown Sugar Pop Tart Cookies. As the rain pattered softly against the window, the warm, buttery scent filled my kitchen. The result was even better than I’d imagined cozy, golden, and perfectly sweet. If this recipe’s been sitting in your board too make it today and tell me how it goes.
Why You’ll Love This Recipe
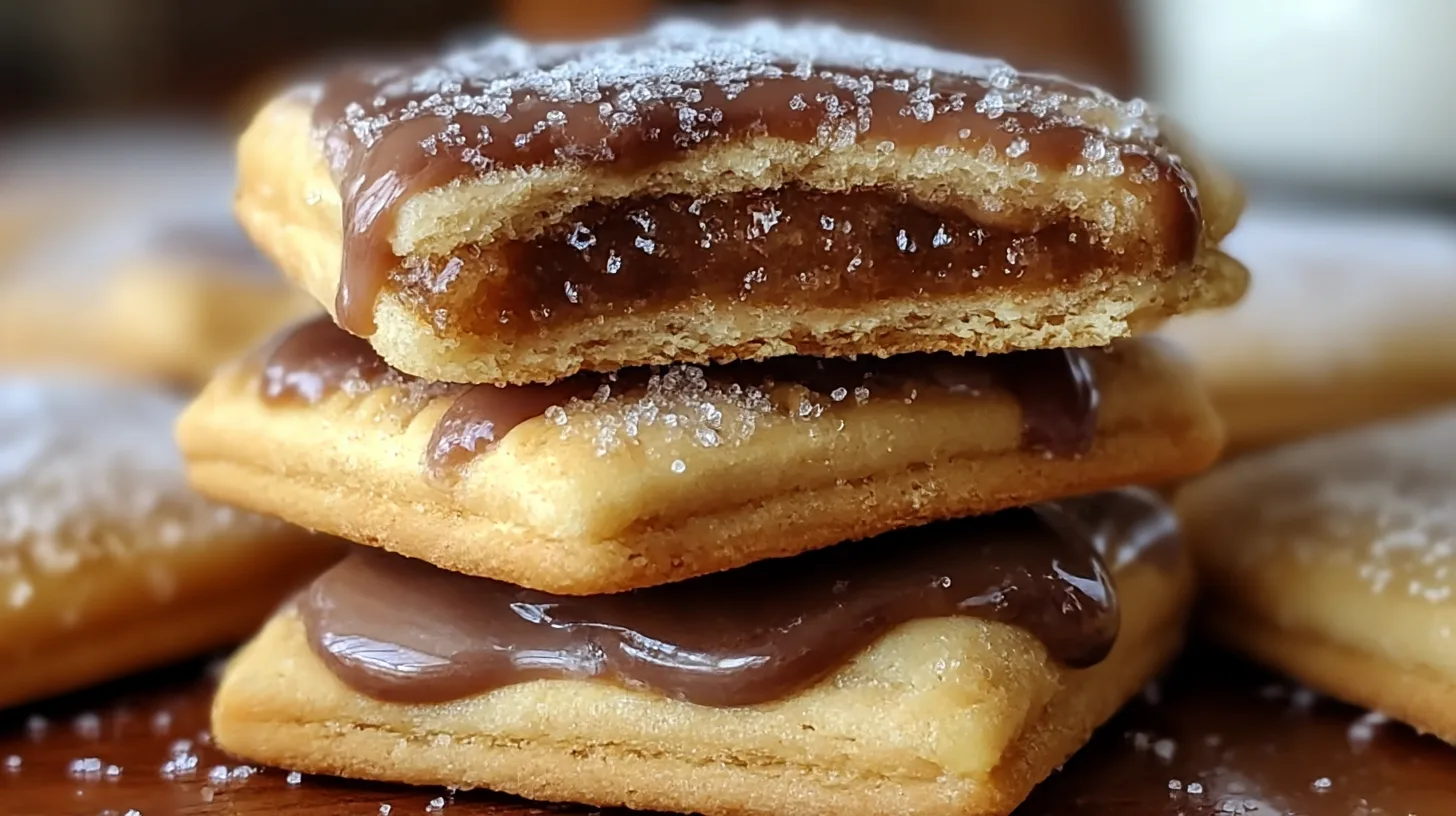
These cookies are a beautiful balance of fun and comfort. They take the beloved flavors of Brown Sugar Pop Tarts and transform them into a soft, chewy cookie that feels both homemade and nostalgic. The dough is buttery and rich, the filling warm and cinnamon-sweet — a combination that never fails to make people smile.
It’s an easy baking recipe that’s also endlessly adaptable. Whether you’re baking for your kids, prepping for a fall party, or simply craving something sweet on a quiet afternoon, these cookies bring a little joy to any occasion.
Ingredients
- 1 cup unsalted butter, softened – gives these cookies their buttery, melt-in-your-mouth texture.
- 1 cup brown sugar, packed – adds that deep caramel flavor we love.
- 1/2 cup granulated sugar – balances sweetness and helps the cookies crisp at the edges.
- 2 large eggs – bind everything together and keep the texture soft.
- 1 teaspoon vanilla extract – adds warmth and depth to the dough.
- 3 cups all-purpose flour – the sturdy base that holds the filling beautifully.
- 1 teaspoon baking powder – helps the cookies rise slightly.
- 1/2 teaspoon baking soda – gives them a light, airy crumb.
- 1/2 teaspoon salt – enhances the sweetness and balances flavor.
- 1 cup brown sugar (for filling) – creates that signature brown sugar center.
- 1 tablespoon cinnamon – brings cozy spice to every bite.
- 1/4 cup milk – adds moisture and helps with mixing.
- 1 cup powdered sugar (for icing) – makes a silky, sweet glaze.
- 1–2 tablespoons milk (for icing consistency) – thins the icing to drizzle-perfect texture.
- Sprinkles (optional) – for a fun, colorful finish.
Directions
Step 1: Make the Dough
In a large mixing bowl, cream together softened butter, brown sugar, and granulated sugar until light and fluffy. Add eggs one at a time, mixing after each, then stir in vanilla extract. In a separate bowl, whisk flour, baking powder, baking soda, and salt. Gradually combine the dry ingredients with the wet mixture until just blended — avoid overmixing for the best texture.
Step 2: Prepare the Filling
In a small bowl, mix brown sugar and cinnamon. This sweet, spiced filling will create that signature Pop Tart flavor inside your cookies. Set aside.
Step 3: Roll Out the Dough
Divide the dough into two halves. On a lightly floured surface, roll out one portion to about ¼ inch thick. Cut into rectangles roughly 3×4 inches in size. Repeat with the remaining dough.
Step 4: Assemble the Cookies
Preheat your oven to 350°F (175°C). Place one dough rectangle on a parchment-lined baking sheet, spoon about a tablespoon of the brown sugar filling into the center, and top with another rectangle. Press edges to seal, then crimp with a fork for that classic Pop Tart look. Continue assembling until all cookies are formed.
Step 5: Bake
Bake cookies for 12–15 minutes, or until the edges are lightly golden. Your kitchen will smell amazing — like brown sugar and cinnamon magic. Allow cookies to cool for 5 minutes on the baking sheet before transferring them to a wire rack.
Step 6: Add the Icing
In a small bowl, whisk together powdered sugar and milk until smooth and pourable. Drizzle over cooled cookies, and if you’d like, add sprinkles for a festive touch. Let the icing set before serving.
Cultural or Technique Note
This recipe takes inspiration from classic American Pop Tarts — the sweet, toaster pastries that defined breakfast for many of us growing up. By transforming them into homemade cookies, you get all that nostalgic flavor with a soft, comforting texture that feels unmistakably homemade. It’s a fun twist that blends classic American convenience with the warmth of traditional baking.
Serving Suggestions
- With a hot cup of coffee or tea for an afternoon pick-me-up: The buttery sweetness pairs beautifully with a dark roast or spiced chai. That first bite — warm, cinnamon-rich, and slightly caramelized — feels like the perfect companion to your favorite mug.
- Paired with a scoop of vanilla ice cream for dessert: The creamy coldness of the ice cream melts into the still-slightly-warm cookie, creating an indulgent balance of textures. It’s the kind of simple, old-fashioned dessert that feels special with very little effort.
- Packed in lunchboxes as a sweet surprise: These cookies hold up well at room temperature and travel beautifully. Tuck one into your child’s lunch or your own workday snack for a comforting midday treat.
- Wrapped in cellophane for holiday cookie exchanges: Their pretty icing drizzle and nostalgic flavor make them a crowd favorite. Add a bow and a gift tag, and you’ve got the perfect homemade present that feels heartfelt and festive.
- Crumbled over yogurt or oatmeal: For a fun breakfast twist, break one cookie into chunks and sprinkle it on top of vanilla yogurt or warm oats. It turns an ordinary morning into something cozy and dessert-like.
Pro Tips for Success
- Cream butter and sugars well: This step is key — beat them until the mixture looks pale and fluffy. It traps air, giving your cookies that soft, bakery-style texture.
- Don’t overfill the centers: A tablespoon of filling is plenty. If you add too much, it can bubble out during baking and cause your cookies to lose their shape.
- Chill the dough briefly if it feels sticky: Just 15–20 minutes in the fridge makes rolling and cutting much easier, especially in warm kitchens.
- Seal the edges firmly with a fork: This not only gives that classic Pop Tart look but also prevents the filling from escaping while baking.
- Let cookies cool completely before icing: The icing will set smoothly on a cool surface, creating a picture-perfect glaze that won’t melt or run.
- Add a pinch of cinnamon to your icing: For an extra flavor boost, stir a dash of cinnamon into the glaze — it ties the flavors together beautifully.
- Store properly: Keep your cookies in an airtight container at room temperature to preserve that soft, chewy texture. A slice of bread in the container can help keep them fresh longer.
Common Mistakes to Avoid
- Overmixing the dough: Once the flour is added, stir gently until just combined. Overworking it makes the cookies tough instead of tender.
- Skipping the salt: Even sweet desserts need a little salt to balance flavor — don’t leave it out.
- Overbaking: The cookies should be just golden on the edges, not brown all over. They’ll continue to set as they cool.
- Icing too soon: If the cookies are warm, the glaze will melt off and lose its pretty sheen. Patience pays off here.
- Not sealing edges well: Use a fork or your fingers to press firmly along the sides — this keeps the filling inside where it belongs.
- Forgetting to cool before storing: Trapped steam can make cookies soggy, so make sure they’re completely cooled before sealing.
Storage & Reheating
- Fridge: Store in an airtight container for 3–4 days. They’ll stay soft and flavorful, especially if you layer parchment paper between each one.
- Freezer: Freeze for up to 2 months. Place parchment between cookies to prevent sticking, and thaw at room temperature before serving.
- Reheat: Warm in the oven at low heat or in a toaster oven until just soft again. You can also microwave for 10–15 seconds with a damp paper towel to bring back that fresh-baked feel.
❓ Frequently Asked Questions
Q1: Can I make these cookies ahead of time?
A1: Definitely! You can prepare the dough up to two days ahead and store it in the fridge until you’re ready to roll, fill, and bake. This actually helps deepen the flavor.
Q2: Can I use a different filling?
A2: Absolutely. Try apple butter for a fall twist, Nutella for a chocolatey version, or raspberry jam for a sweet-tart contrast. Just keep the same filling amount so the texture stays right.
Q3: Can I make them gluten-free?
A3: Yes! A 1:1 gluten-free flour blend designed for baking works perfectly. The texture remains soft and chewy with no major adjustments needed.
Q4: Do these cookies need to be refrigerated after icing?
A4: Once the icing has set, they’re fine at room temperature in a sealed container. If your kitchen is particularly warm, you can refrigerate them — just let them come back to room temperature before serving for the best flavor.
Q5: How can I make them extra special for holidays?
A5: Add festive sprinkles, drizzle with white chocolate, or flavor the icing with a hint of maple or caramel extract. They’ll look beautiful on any holiday dessert table.
Closing Paragraph
These Brown Sugar Pop Tart Cookies are more than just a dessert — they’re a bite of pure nostalgia. With their soft texture, cinnamon sweetness, and buttery richness, they’re perfect for cozy weekends, bake sales, or sharing with loved ones. Make them once, and they’ll quickly earn a spot in your favorite fall baking recipes. Gather your ingredients, preheat your oven, and enjoy the sweet scent that fills your kitchen.
Final Thoughts
There’s something magical about recipes that remind us of simpler times — and these cookies do just that. They’re comforting, playful, and full of warmth, just like the best memories from our kitchens. I hope you’ll bake a batch, share them, and make your own sweet traditions along the way. Follow me on Pinterest for more cozy, quick, and nostalgic recipes.

Brown Sugar Pop Tart Cookies
Equipment
- Mixing Bowl
- Electric Mixer
- Rolling Pin
- Baking Sheet
- Parchment Paper
- Fork
- Wire Rack
Ingredients
Dough
- 1 cup unsalted butter softened
- 1 cup brown sugar packed
- 1/2 cup granulated sugar
- 2 large eggs
- 1 tsp vanilla extract
- 3 cups all-purpose flour
- 1 tsp baking powder
- 1/2 tsp baking soda
- 1/2 tsp salt
Filling
- 1 cup brown sugar
- 1 tbsp cinnamon
- 1/4 cup milk
Icing
- 1 cup powdered sugar
- 1-2 tbsp milk adjust for consistency
- sprinkles optional
Instructions
- Cream together butter, brown sugar, and granulated sugar until light and fluffy. Add eggs one at a time, then vanilla extract.
- In a separate bowl, whisk flour, baking powder, baking soda, and salt. Gradually combine with wet mixture until just blended.
- In a small bowl, mix brown sugar and cinnamon for the filling. Set aside.
- Divide dough in half. Roll out to 1/4 inch thick and cut into 3×4 inch rectangles.
- Preheat oven to 350°F (175°C). Add 1 tbsp filling to one rectangle, top with another, seal edges, and crimp with a fork.
- Bake for 12–15 minutes until lightly golden. Cool on the baking sheet for 5 minutes, then transfer to wire rack.
- Whisk powdered sugar and milk until smooth. Drizzle over cooled cookies and add sprinkles if desired.