Hi, I’m Lina, I’m 33 and living in the United States. My love for cooking started in the most natural way by spending time in the kitchen with my grandmother. I stumbled upon this recipe while scrolling through a chaotic Reddit cooking thread full of hilarious fails, genius shortcuts, and people arguing over cocoa brands. My curiosity won, so I gave it a try, and wow it worked! Try it and come back to share your results I love hearing creative twists from real kitchens!
Why You’ll Love This One Bowl 20 Minute Red Velvet Crinkle Cookies
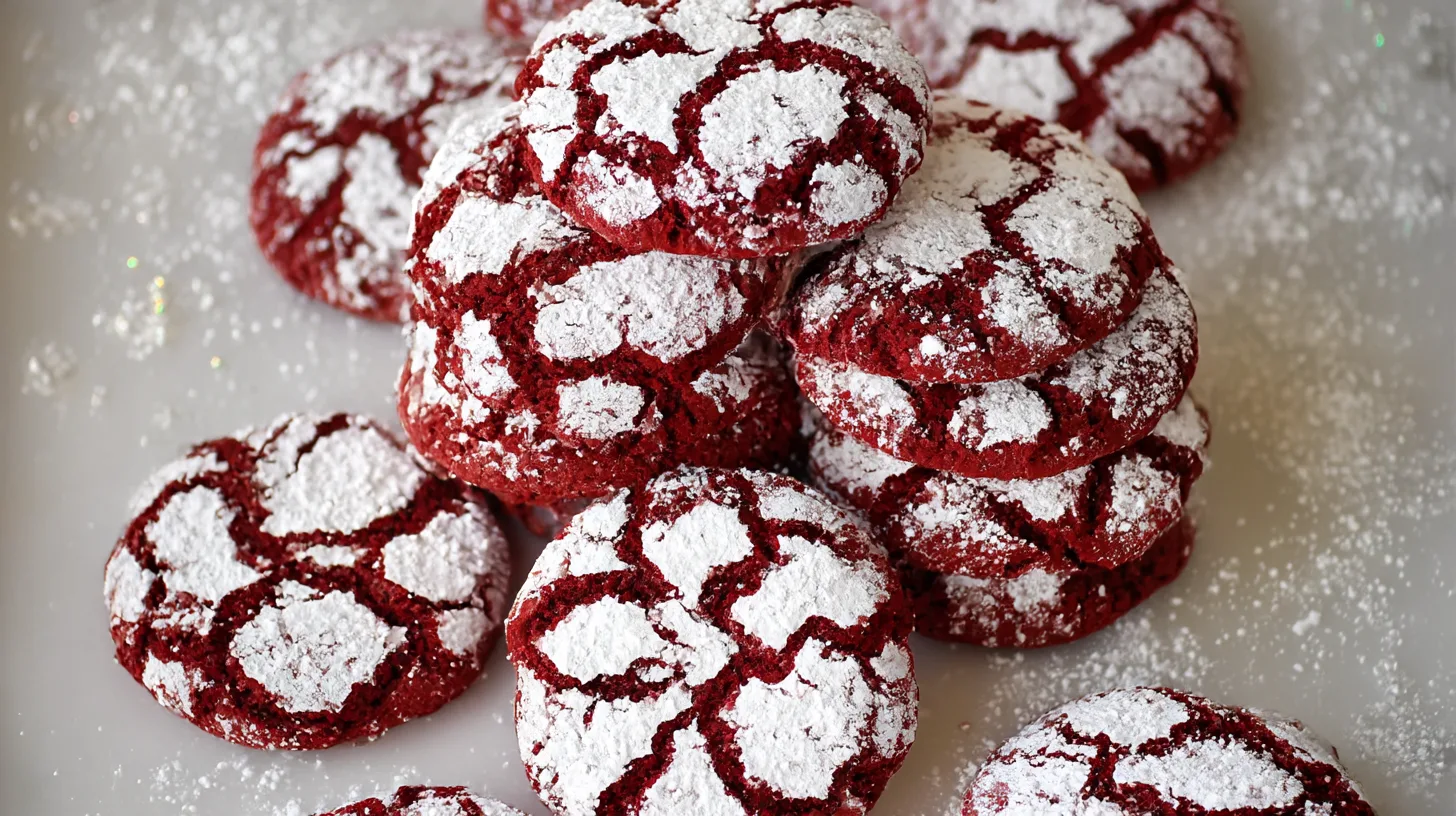
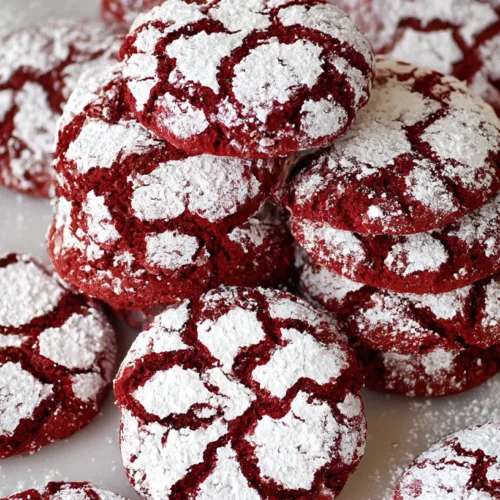
These red velvet crinkle cookies are the easiest festive dessert you’ll make this season. There’s no chilling, no mixer needed, and no complicated steps — just whisk, scoop, roll, and bake. They have that classic red velvet flavor we all crave: mellow cocoa with a touch of vanilla, finished with a soft, brownie-like texture inside. Plus, their vibrant color and crackled coating make them a showstopper on any cookie platter.
Ingredients Detailed
- 75g neutral oil – keeps the cookies soft and fudgy without dairy.
- 100g light or dark brown sugar – adds a warm, molasses depth of sweetness.
- 50g granulated sugar – balances the flavor and helps form that shiny crust.
- 1 large egg – binds everything together for that chewy bite.
- 1 tsp vanilla extract or paste – adds aroma and round flavor.
- 5g red gel food coloring – gives that iconic red velvet hue.
- 160g all-purpose flour – the base that holds it all.
- 20g cocoa powder, sifted – classic chocolate flavor in a lighter red velvet style.
- ½ tsp kosher salt – enhances all the other flavors.
- ¼ tsp baking soda – helps the cookies puff up beautifully.
- Granulated sugar & powdered sugar for rolling – the secret to that signature crinkle look.
Directions (Step-by-Step Cooking Guide)
- Preheat and prepare. Set your oven to 325°F (165°C) and line one or two sheet pans with parchment paper. This gentle heat helps the cookies rise slowly for that perfect texture.
- Mix the wet ingredients. In a medium bowl, whisk together the oil, brown sugar, granulated sugar, egg, vanilla, and red gel food coloring until thick and smooth. You’ll notice it starts to look glossy — that’s when it’s just right.
- Add the dry ingredients. Sift in the flour, cocoa powder, salt, and baking soda. Fold everything together with a spatula until just combined. The dough will look a little oily and sticky, but don’t worry — that’s exactly how it should be.
- Set up your rolling station. In two small bowls, place granulated sugar in one and powdered sugar in the other. This double roll ensures a dramatic crinkle and keeps the coating from melting into the dough.
- Form the cookie balls. Using a cookie scoop, portion out about 40g of dough and drop each scoop directly into the granulated sugar. Roll gently, then transfer to the powdered sugar and coat generously. Press lightly to help it stick.
- Bake. Arrange the cookies on your prepared sheet pan — they’ll flatten slightly, which is perfect. Bake for 12–13 minutes, just until the edges are set and the tops puff up with pretty cracks.
- Cool and enjoy. Let the cookies cool on the pan for about 10–15 minutes before moving them to a rack. They’ll firm up slightly as they cool but stay soft inside.
Cultural or Technique Note
Crinkle cookies are a classic American favorite, known for their snowy, crackled tops and tender centers. The red velvet version brings a festive spin to this nostalgic treat, blending cocoa richness with that eye-catching red hue that makes it a Christmas baking staple.
Serving Suggestions
There are so many cozy ways to enjoy these One Bowl 20 Minute Red Velvet Crinkle Cookies, especially during the holidays. Try one of these simple yet festive ideas:
- With a mug of hot cocoa or peppermint latte – The rich cocoa flavor in the cookie pairs perfectly with a warm drink. It’s a match made for chilly winter mornings or fireside evenings.
- On a Christmas cookie platter with sugar cookies and shortbread – The red and white crinkle pattern adds a cheerful pop of color among golden, buttery treats.
- As edible gifts wrapped in clear bags and ribbon – Stack a few in a clear cellophane bag, tie with red ribbon, and you’ve got a thoughtful, homemade gift that feels personal and heartfelt.
- Crumbled over vanilla ice cream for an indulgent dessert – The contrast between cold, creamy ice cream and chewy, fudgy cookie crumbs is downright dreamy.
- Alongside a holiday brunch spread – A plate of these next to fruit and coffee makes even a simple breakfast feel festive.
Pro Tips for Success
Make your batch bakery-worthy with these tried-and-true tips from my kitchen:
- Use gel food coloring for bold red color without thinning out your dough. A little goes a long way and keeps the texture perfect.
- Roll the dough directly into the sugar bowls — it’s sticky, yes, but it helps coat the dough evenly and prevents sticking to your hands.
- Don’t overbake; these cookies are best when the edges are just set and the centers stay soft and fudgy. They’ll continue to firm up slightly as they cool.
- Try brown butter for a flavor upgrade. It adds a nutty, toffee-like aroma that pairs beautifully with cocoa.
- Use a cookie scoop so every cookie is the same size, ensuring even baking and perfect presentation.
- Let them cool on the tray first. They’re delicate straight from the oven, and giving them a few minutes to rest keeps them intact and chewy.
Common Mistakes to Avoid
Even simple cookies can go wrong with a few small missteps. Here’s what to watch out for:
Using liquid food coloring: It can water down your dough and make the red color dull. Stick to gel food coloring for vibrant results.
Skipping the granulated sugar roll: The powdered sugar won’t cling as well without this first layer, and you’ll lose that striking crinkle pattern.
Overmixing the dough: This toughens the texture and takes away from that soft, brownie-like chew. Mix just until combined.
Baking at too high a temperature: A hotter oven makes the cookies spread too much and can brown the edges. Lower heat keeps them puffy and tender.
Moving cookies too early: They need a few minutes to set on the pan or they’ll fall apart. Patience pays off here.
Storage & Reheating
Keep your red velvet crinkle cookies tasting bakery-fresh with these easy storage tips:
Fridge: Store in an airtight container for 3–4 days. The texture stays soft and chewy even when chilled.
Freezer: Though best enjoyed fresh, you can freeze baked cookies for up to 2 months. Just layer them between parchment paper to prevent sticking.
Reheat: To bring back that fresh-from-the-oven warmth, warm them in a low oven for a few minutes or enjoy at room temperature with a cup of coffee.
For holiday gifting, pack them in tins or boxes lined with parchment — they hold up beautifully and travel well!
Frequently Asked Questions (FAQ)
Q1: What makes these cookies red velvet?
: Red velvet is known for its mild cocoa flavor with a hint of vanilla and that deep red hue. It’s not as rich as a full chocolate cookie, but still indulgent and soft.
Q2: Can I make these with butter instead of oil?
: Yes! You can swap in brown butter for extra flavor. It adds a rich, nutty taste that complements the cocoa beautifully — just let it cool before mixing it in.
Q3: What’s the best food coloring to use?
: Gel food coloring is the way to go. It gives vibrant color without adding extra liquid to the dough, helping your cookies hold their shape.
Q4: Can I freeze the dough ahead of time?
: It’s best to bake this dough fresh since it’s oil-based and doesn’t freeze quite as well as butter doughs. Luckily, it only takes about 20 minutes start to finish, so it’s easy to make right before you need them!
Q5: How long do they keep?
: These cookies stay soft and fudgy for up to five days when stored in an airtight container at room temperature. Just try not to stack them too much — the powdered sugar coating is delicate.
Closing Paragraph
These One Bowl 20 Minute Red Velvet Crinkle Cookies are the perfect way to bring color and joy to your holiday baking. They’re quick enough for weeknights yet special enough for celebrations. Each bite feels like a soft, chocolatey hug dusted in sugar — cozy, simple, and so festive. Share them at your next cookie exchange or box them up as sweet little gifts straight from your kitchen.
Final Thoughts
I love how these cookies capture everything I adore about the holidays — bright, warm, and made to share. There’s no need for fancy steps or long chill times; just simple ingredients that create pure joy. I hope they bring your home the same cozy feeling they bring mine. Follow me on Pinterest for more cozy, quick, and nostalgic recipes.
One Bowl 20 Minute Red Velvet Crinkle Cookies
Equipment
- Mixing Bowl
- Whisk
- Cookie scoop
- Sheet Pan
- Parchment Paper
Ingredients
Cookie Dough
- 75 g neutral oil
- 100 g light or dark brown sugar
- 50 g granulated sugar
- 1 large egg
- 1 tsp vanilla extract or paste
- 5 g red gel food coloring
- 160 g all-purpose flour
- 20 g cocoa powder sifted
- 1/2 tsp kosher salt
- 1/4 tsp baking soda
For Rolling
- granulated sugar for first coating
- powdered sugar for second coating
Instructions
- Preheat the oven to 325°F (165°C) and line baking sheets with parchment paper.
- In a bowl, whisk oil, brown sugar, granulated sugar, egg, vanilla, and red gel coloring until smooth and glossy.
- Sift in the flour, cocoa powder, salt, and baking soda. Fold together with a spatula until just combined. Dough will be soft and slightly sticky.
- Set up two bowls for rolling — one with granulated sugar and the other with powdered sugar.
- Use a cookie scoop to portion out ~40g balls of dough. Roll each in granulated sugar, then generously in powdered sugar. Press gently to help the sugar stick.
- Place on sheet pans with space between cookies. Bake for 12–13 minutes, until puffed and crinkled but still soft.
- Let cool on pan for 10–15 minutes before transferring to a rack. Enjoy!